
As summer rolls around, there’s nothing quite like the feeling of sun on your skin, the scent of fresh fruit in the air, and the anticipation of outdoor gatherings with friends and family. Picture this: You’ve invited everyone over, the grill is sizzling, and as the warm golden light of the evening creeps in, you serve a dessert that leaves everyone raving. That dessert? Key Lime Pie Bars. These tangy treats are a refreshing way to end a warm summer day, and they’re easy to whip up, making them a perfect crowd-pleaser.
Recipe Timing
- Prep Duration: 10 minutes
- Active Cooking: 25 minutes
- Total Duration: 3 hours (including cooling and chilling)
- Portion Size: Serves 9
- Complexity: Simple
Nutritional Recipe
- Calories per portion: 160
- Protein: 2g
- Carbs: 23g
- Fats: 7g
- Fiber: 0g
- Sugars: 12g
- Sodium: 80mg
Why You’ll Love This Key Lime Pie Bars: The Best Dessert Bars for Your Summer Crowd
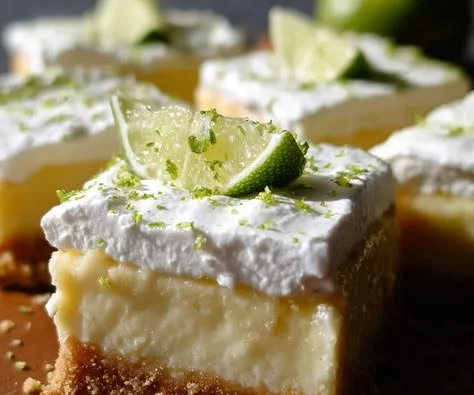
The beauty of Key Lime Pie Bars lies not just in their delightful taste but also in their simplicity. Imagine a buttery graham cracker crust perfectly cradling a smooth, creamy key lime filling that strikes the perfect balance between sweet and tangy—brightening up your dessert table. Plus, they are neatly portioned into bars, so no messy slicing; just cut, dust with powdered sugar, and serve. They are portable, making them ideal for picnics or backyard soirées, and the vibrant yellow hue is sure to bring sunshine to your summer gatherings.
The Complete Cooking Journey
Every time I make these bars, I’m reminded of lazy summer afternoons spent under a blue sky. The tang of key lime juice takes me back to family vacations in Florida, where key lime pie was always the star ending to our meals. As I pour the smooth custard over the freshly baked crust, I can’t help but smile, knowing that in just a few hours, my kitchen will be filled with the sweet scent of citrus and the laughter of friends.
Ingredients:
- 1 cup graham cracker crumbs
- 1/2 cup unsalted butter, melted
- 1/3 cup sugar
- 2 large eggs
- 1 can (14 oz) sweetened condensed milk
- 1/2 cup key lime juice
- Zest of 2 key limes
- Powdered sugar for dusting
Method:
Step 1: Preheat the Oven
Start by preheating your oven to 350°F (175°C). A hot oven is essential for the crust to crisp up nicely.
Step 2: Prepare the Crust Mixture
In a mixing bowl, combine the graham cracker crumbs, melted butter, and sugar. Stir them together until everything is well mixed and resembles wet sand. This will be the foundation of our pie bars, so make sure it’s combined well!
Step 3: Press the Crust into the Dish
Firmly press the graham cracker mixture into the bottom of a greased 8×8-inch baking dish. Use the back of a measuring cup or your fingers to ensure an even layer—this crust is what holds all that delicious filling.
Step 4: Whisk Together the Filling
In another bowl, whisk together the eggs, sweetened condensed milk, key lime juice, and lime zest until smooth and well blended. The zesty aroma is intoxicating!
Step 5: Pour the Filling Over the Crust
Pour the creamy key lime filling over the prepared crust, spreading it evenly. This layer is the star of the show and gives the bars their signature tartness.
Step 6: Bake Until Set
Place the dish in the oven and bake for 20 to 25 minutes, or until the filling is set. You want it to jiggle slightly, but not too much—then it’s ready to come out.
Step 7: Cool and Refrigerate
Once out of the oven, let the bars cool completely at room temperature. Once cooled, refrigerate for a few hours or until cold. This waiting period is key for achieving that perfect texture.
Step 8: Cut and Dust
After they’ve chilled, cut the bars into squares and dust the tops with powdered sugar right before serving. This final touch adds a bit of elegance and sweetness that complements the tartness of the lime.
Serving Suggestions & Pairings
Serve your Key Lime Pie Bars chilled, with a side of whipped cream or a scoop of vanilla ice cream for an extra indulgence. Pair them with refreshing drinks like a crisp iced tea or a fruity spritzer to celebrate those sunny days.
Storage & Leftovers Guide
These bars can be stored in the refrigerator, covered, for up to 5 days. If you want to make them ahead of time, they actually taste even better after a day in the fridge, allowing the flavors to meld and infuse beautifully.
Kitchen Wisdom & Success Tips
- Use Fresh Limes: For the best flavor, always use fresh key limes or key lime juice, as it significantly enhances the pie’s taste.
- Don’t Overbake: Keep an eye on the bars while they bake. A slight jiggle in the center means they’re perfectly set.
- Chill Well: Patience is key! Refrigerate them thoroughly—cold bars make for a refreshing treat.
- Precision in Measurements: Accurately measuring each ingredient, especially the lime juice and condensed milk, is crucial for the right balance of flavors.
Flavor Variations & Adaptations
Feel free to switch it up! Add a layer of coconut cream for a tropical twist or fold in some freshly whipped cream for a richer filling. You could even experiment with other citrus fruits like regular limes or lemons for a different flavor palette.
Reader Questions & Solutions
-
Can I use regular limes instead of key limes?
- Absolutely! Regular limes will give you a similar tangy flavor, but key limes add a unique taste.
-
What can I use instead of graham crackers?
- Crush some digestive biscuits or vanilla wafer cookies for a different flavor base.
-
How do I fix a filling that won’t set?
- If your filling is too runny, it may have been undercooked—ensure to check the doneness or add more eggs before baking.
-
Can I freeze these bars?
- Yes! Once completely cooled, wrap them tightly and freeze for up to 3 months. Just thaw them overnight in the fridge before enjoying.
-
What’s the best way to cut them neatly?
- Use a sharp knife dipped in hot water for clean cuts! Wipe the knife clean between cuts for perfect squares.
Wrapping Up
With a little bit of love and care, these Key Lime Pie Bars are sure to become a summertime favorite in your household. Their vibrant flavor and easy preparation make them perfect for any occasion. So gather your ingredients, embrace the joy of cooking, and let these delightful bars add a touch of zest to your sunny celebrations. Happy baking!
PrintKey Lime Pie Bars
Tangy Key Lime Pie Bars with a buttery graham cracker crust, perfect for summer gatherings.
- Prep Time: 10 minutes
- Cook Time: 25 minutes
- Total Time: 180 minutes
- Yield: 9 servings 1x
- Category: Dessert
- Method: Baking
- Cuisine: American
- Diet: Vegetarian
Ingredients
- 1 cup graham cracker crumbs
- 1/2 cup unsalted butter, melted
- 1/3 cup sugar
- 2 large eggs
- 1 can (14 oz) sweetened condensed milk
- 1/2 cup key lime juice
- Zest of 2 key limes
- Powdered sugar for dusting
Instructions
- Preheat the oven to 350°F (175°C).
- Combine the graham cracker crumbs, melted butter, and sugar in a mixing bowl.
- Press the mixture into the bottom of a greased 8×8-inch baking dish.
- Whisk together the eggs, sweetened condensed milk, key lime juice, and lime zest in another bowl.
- Pour the creamy key lime filling over the prepared crust.
- Bake for 20 to 25 minutes, or until the filling is set.
- Cool completely at room temperature, then refrigerate for a few hours.
- Cut into squares and dust with powdered sugar before serving.
Notes
For best flavor, use fresh key limes. These bars can be stored in the refrigerator for up to 5 days.
Nutrition
- Serving Size: 1 serving
- Calories: 160
- Sugar: 12g
- Sodium: 80mg
- Fat: 7g
- Saturated Fat: 4g
- Unsaturated Fat: 3g
- Trans Fat: 0g
- Carbohydrates: 23g
- Fiber: 0g
- Protein: 2g
- Cholesterol: 70mg