
There’s something magical about dessert that wraps us in a warm embrace, no matter the season. For me, that warmth is encapsulated perfectly in a classic Italian tiramisu. Growing up, my weekends were often spent in my grandmother’s kitchen, where the rich scent of espresso spent hours swirling in the air, mingling effortlessly with the promise of sweet indulgence. The moment her signature tiramisu came out of the refrigerator — chilled to perfection and dusted with cocoa — I knew we were in for a special treat.
Now, I want to share with you my all-time favorite recipe for Best Classic Italian Tiramisu. This simple guide will lead you step-by-step to a dreamy dessert full of creamy layers, bold coffee, and the delightful crunch of ladyfingers. With a few ingredients and a little patience, you can create a show-stopping dessert that impresses at dinner parties or simply elevates your weeknight dinner.
Recipe Timing
- Prep Duration: 30 minutes
- Active Cooking: 20 minutes
- Total Duration: 4 hours and 50 minutes (includes chill time)
- Portion Size: Serves 8
- Complexity: Simple
Nutritional Recipe
- Calories per portion: Approximately 325
- Protein: 6 grams
- Carbs: 33 grams
- Fats: 20 grams
- Fiber: 0 grams
- Sugars: 12 grams
- Sodium: 90 mg
Why You’ll Love This Best Classic Italian Tiramisu Recipe: Your Easy Guide to Creamy Coffee Dessert Perfection
This tiramisu isn’t just any dessert; it’s a celebration of flavors and textures. The luscious mascarpone cheese brings balance to the bitter depth of the espresso, while the airy whipped cream adds lightness. Each bite is an invitation to unwind and indulge. Whether you’re crafting it for a special occasion or just to treat yourself, this dish transcends the ordinary, whisking you straight to a cozy Italian café. And the best part? You’ll look like a culinary genius, even if this is your first time making it!
The Complete Cooking Journey
This journey begins by melding rich flavors and ends with a delicate masterpiece chilled to perfection, ready to wow your taste buds. With easy-to-follow steps, you’ll discover how simple it is to create something extraordinary. Let’s dive into this culinary adventure!
Ingredients:
- 6 egg yolks
- 3/4 cup granulated sugar
- 2/3 cup milk
- 1 1/4 cups heavy cream
- 1 cup mascarpone cheese
- 1 cup brewed espresso, cooled
- 1 package ladyfingers
- Cocoa powder for dusting
Method:
Step 1: Whisking Egg Yolks and Sugar
In a saucepan, whisk together the egg yolks and sugar until thick. This creamy mixture sets the stage for our rich custard.
Step 2: Thickening the Mixture
Stir in the milk and cook over medium heat until it thickens, stirring frequently to avoid any lumps. Once it reaches a custard-like consistency, let it cool completely.
Step 3: Whipping Cream
In a separate bowl, whip the heavy cream until soft peaks form. This airy texture is crucial for our layered dessert, so don’t rush this step!
Step 4: Folding in Mascarpone
Gently fold in the mascarpone cheese into the whipped cream until just combined. The result should be a soft, fluffy mixture that will cradle our ladyfingers beautifully.
Step 5: Combining Mixtures
Now, take your cooled egg mixture and gently incorporate it into the mascarpone mixture. The goal here is to unite flavors without deflating the cream.
Step 6: Layering Ladyfingers
Dip the ladyfingers one by one in the espresso, ensuring they soak up that rich flavor but are not completely soggy. Layer them in your dish to create your first base.
Step 7: Spreading the Mixture
Spread half of the mascarpone mixture over the ladyfinger layer. Don’t worry about perfection — rustic is beautiful!
Step 8: Final Layering
Add another layer of espresso-dipped ladyfingers followed by the remaining mascarpone mixture. Smooth the top for a neat finish, but remember, it will be dusted beautifully later.
Step 9: Chilling the Dessert
Chill in the refrigerator for at least 4 hours — the waiting game is part of the joy, but I promise it will be worth it!
Step 10: Dusting with Cocoa
Before serving, dust the top generously with cocoa powder. This final touch is like a finishing bow on your dessert masterpiece.
Serving Suggestions & Pairings
Pair your tiramisu with a rich Italian coffee or a dessert wine for a complete Italian experience. It’s also delightful with fresh berries or a scoop of vanilla ice cream. Don’t shy away from serving it alongside a light, fluffy panna cotta — the contrast will have your guests raving!
Storage & Leftovers Guide
Store any leftovers in an airtight container in the refrigerator for up to 3 days. If you find yourself with extra ladyfingers, save them for another delightful dessert, like a fruit trifle.
Kitchen Wisdom & Success Tips
- Make sure your ingredients are at room temperature for easier mixing.
- Don’t skip chilling the tiramisu! This step is essential for allowing the flavors to meld.
- Feel free to experiment with flavored espresso or add a splash of coffee liqueur for an adult twist!
Flavor Variations & Adaptations
Want to switch things up? Try incorporating flavors like chocolate or nutella by swirling it into the mascarpone mixture. For a caffeine-free version, substitute decaf espresso. You can also use almond or coconut milk for a lighter or dairy-free adaptation.
Reader Questions & Solutions
-
Can I use store-bought mascarpone? Yes! While homemade mascarpone is a treat, store-bought works perfectly for this recipe.
-
What if I can’t find ladyfingers? You can use sponge cake or even biscotti as an alternative, though the texture may differ slightly.
-
How do I know when the egg yolks are thick enough? They should be pale, creamy, and capable of leaving a ribbon-like trail when drizzled from your whisk.
-
Can I freeze tiramisu? Yes, but for best results, freeze individual portions. Wrap tightly to avoid freezer burn and consume within 1 month.
-
What if my whipped cream isn’t thickening? Ensure your bowl and beaters are chilled, and you’re using heavy cream. It’s all about the right temperature and technique!
Wrapping Up
Creating this Best Classic Italian Tiramisu is not just about following a recipe; it’s about bringing a little piece of Italy into your home and sharing it with those you love. I hope you feel inspired to whip up this iconic dessert and experience its magic for yourself. Remember, cooking is all about joy — so put on some Italian music, gather your ingredients, and let’s celebrate flavor together! Buon appetito!
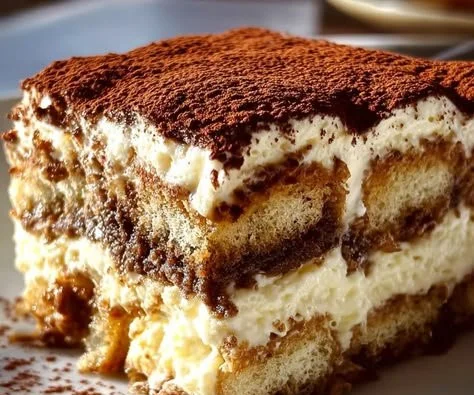
PrintBest Classic Italian Tiramisu

A classic Italian tiramisu featuring creamy layers, bold coffee, and ladyfingers, perfect for any dessert lover.
- Prep Time: 30 minutes
- Cook Time: 20 minutes
- Total Time: 290 minutes
- Yield: 8 servings 1x
- Category: Dessert
- Method: Refrigeration
- Cuisine: Italian
- Diet: Vegetarian
Ingredients
- 6 egg yolks
- 3/4 cup granulated sugar
- 2/3 cup milk
- 1 1/4 cups heavy cream
- 1 cup mascarpone cheese
- 1 cup brewed espresso, cooled
- 1 package ladyfingers
- Cocoa powder for dusting
Instructions
- Whisking egg yolks and sugar in a saucepan until thick.
- Stir in milk and cook over medium heat until thickened.
- Whip heavy cream until soft peaks form.
- Fold mascarpone cheese into the whipped cream until just combined.
- Combine the cooled egg mixture with the mascarpone mixture.
- Dip ladyfingers in espresso, then layer in a dish.
- Spread half of the mascarpone mixture over the first layer of ladyfingers.
- Add another layer of espresso-dipped ladyfingers and the remaining mascarpone mixture.
- Chill in the refrigerator for at least 4 hours.
- Dust with cocoa powder before serving.
Notes
Store leftovers in an airtight container for up to 3 days.
Nutrition
- Serving Size: 1 serving
- Calories: 325
- Sugar: 12g
- Sodium: 90mg
- Fat: 20g
- Saturated Fat: 12g
- Unsaturated Fat: 8g
- Trans Fat: 0g
- Carbohydrates: 33g
- Fiber: 0g
- Protein: 6g
- Cholesterol: 250mg