
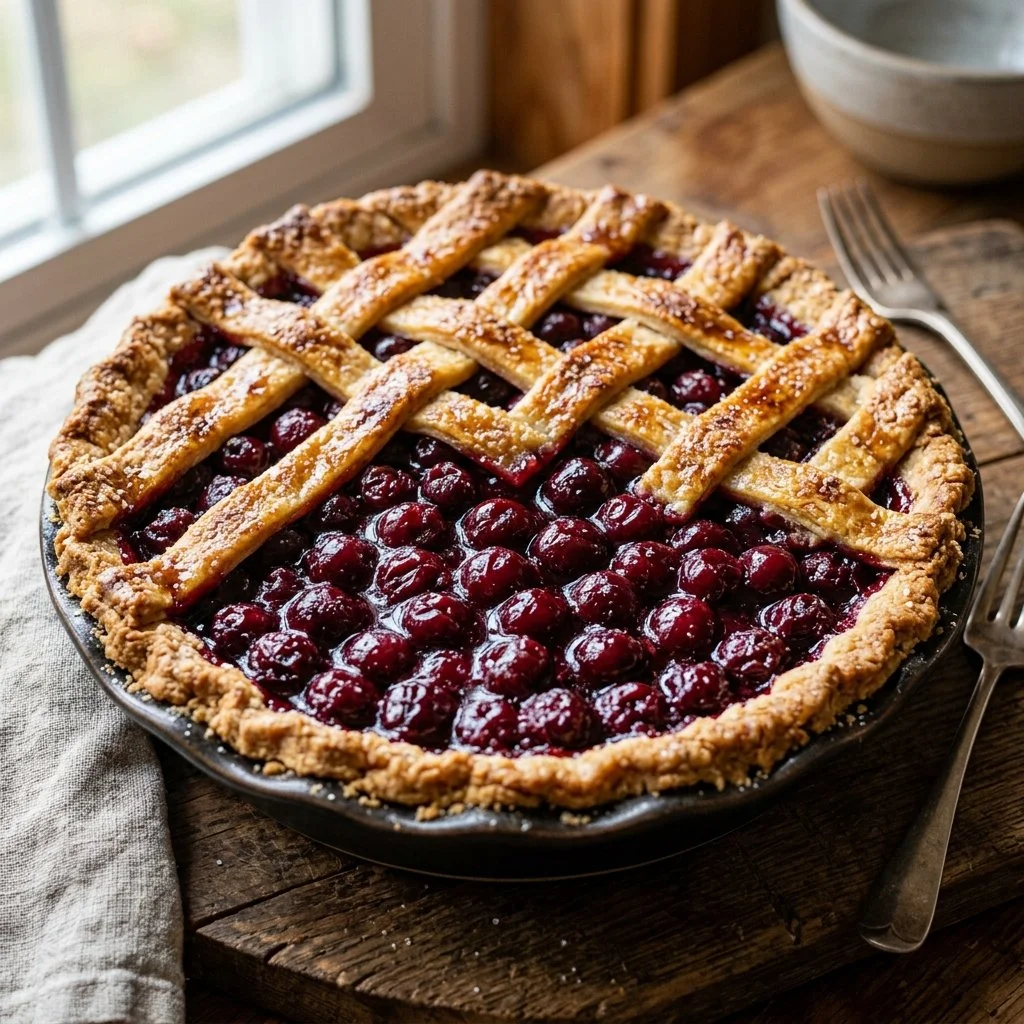
There’s something undeniably magical about a warm cherry pie. As I sit on my grandmother’s porch, the sweet scent of cherries melds with the golden crust baking in the oven, transporting me back to summer afternoons spent picking cherries from her backyard trees. Each bite of the pie captures the essence of those moments—sunshine, laughter, and love. This beloved recipe, passed down through generations, always brings a wave of nostalgia and joy. Today, I invite you to create this cherished dessert, whether it is for a family gathering, a cozy night in, or simply to celebrate the beauty of seasonal fruit.
Recipe Timing
- Prep Duration: 15 minutes
- Active Cooking: 35 minutes
- Total Duration: 50 minutes
- Portion Size: 8 servings
- Complexity: Simple
Nutritional Recipe
- Calories per portion: 280
- Protein: 2g per serving
- Carbs: 40g per serving
- Fats: 12g per serving
- Fiber: 2g per serving
- Sugars: 20g per serving
- Sodium: 150mg per serving
Why You’ll Love This Cherry Pie
This cherry pie is a delight for the senses! The vibrant cherries burst with flavor, complemented by the sweetness of sugar and the slight tartness of lemon juice. The addition of almond extract adds a lovely depth, while the flaky pie crust provides the perfect texture. It’s versatile too—enjoy it warm with a scoop of vanilla ice cream or at room temperature with a dollop of whipped cream. Each slice is an invitation to savor the moment.
The Complete Cooking Journey
Gather your ingredients, preheat the oven, and let’s embark on this delightful journey into the world of baking. From prepping the cherries to winding down as the pie cools, each step is a part of the experience that brings you closer to creating something extraordinary.
Ingredients:
- 2 cups fresh or frozen cherries
- 1 cup sugar
- 2 tablespoons cornstarch
- 1 tablespoon lemon juice
- 1 teaspoon vanilla extract
- 1/4 teaspoon almond extract
- 1 tablespoon butter
- 1 package pie crusts (or homemade)
- 1 egg (for egg wash)
Method:
Step 1: Preheat the Oven
Preheat the oven to 425°F (220°C). This sets the stage for baking, ensuring your pie crust becomes a beautifully golden canvas.
Step 2: Mix the Cherry Filling
In a bowl, combine the cherries, sugar, cornstarch, lemon juice, vanilla extract, and almond extract. Stir to coat the cherries evenly, allowing the sweet and tart flavors to meld together.
Step 3: Roll Out the First Pie Crust
Roll out one pie crust and place it in a pie dish. Make sure it’s evenly distributed along the bottom and edges for a sturdy foundation.
Step 4: Pour in the Cherry Mixture
Carefully pour the cherry mixture into the prepared crust, spreading it evenly. Don’t forget to dot the top with butter—it enhances the flavor and adds a delicious richness!
Step 5: Cover with the Second Pie Crust
Roll out the second pie crust and lay it over the pie, sealing the edges tightly. This crust acts like a protective blanket for the juicy filling inside.
Step 6: Create Steam Vents
Using a sharp knife, cut slits in the top crust. This allows steam to escape as it bakes, preventing your pie from becoming soggy and ensuring it bakes evenly.
Step 7: Brush with Egg Wash
Brush the top crust with beaten egg. This step gives the crust a beautiful golden sheen as it bakes—an essential touch for a pie that looks as good as it tastes.
Step 8: Bake to Perfection
Place the pie in the preheated oven and bake for 30-35 minutes or until the crust is golden brown and the cherry filling is bubbling tantalizingly. Keep an eye on it to ensure it doesn’t over-brown!
Step 9: Cool Before Serving
Once baked, let the pie cool before serving. This cooling time allows the filling to set, making it easier to slice and serve.
Serving Suggestions & Pairings
This cherry pie shines on its own, but pairing it with a scoop of vanilla ice cream or a dollop of freshly whipped cream heightens the experience. For a more adventurous take, try it with a drizzle of dark chocolate or a sprinkle of chopped nuts for added texture. It’s perfect for summer barbecues, holiday gatherings, or cozy evenings by the fireplace.
Storage & Leftovers Guide
Keep any leftovers in an airtight container in the refrigerator for up to four days. You can also freeze the pie for up to three months. Just ensure it’s wrapped securely to prevent freezer burn. When you’re ready to indulge, thaw it in the fridge overnight and reheat in the oven for the best results!
Kitchen Wisdom & Success Tips
- Choose the Right Cherries: If using fresh cherries, opt for ripe ones for the sweetest flavor. For frozen, make sure they are unsweetened to control sugar levels.
- Prevent Soggy Crust: To avoid a soggy bottom, bake your crust blind (pre-bake) for a few minutes before filling it with cherries.
- Let the Pie Cool: Resist the urge to cut into the pie immediately. Letting it cool allows the filling to thicken, preventing it from running out.
Flavor Variations & Adaptations
Feeling adventurous? Swap some of the cherries for blueberries or raspberries for a mixed berry pie. You can experiment with various spices such as cinnamon or nutmeg for added warmth, or use different extracts like coconut for a tropical twist.
Reader Questions & Solutions
-
Can I use canned cherries instead?
Yes! Just be sure to drain them well before mixing them with the other ingredients. You may want to reduce the sugar slightly since canned cherries are usually sweeter. -
How do I make a gluten-free cherry pie?
You can use a gluten-free pie crust or make your own using gluten-free flour blends. The filling remains the same. -
What if my cherries are too tart?
To balance the tartness, increase the sugar by a couple of tablespoons. Taste the filling before pouring it into the crust. -
Can I prepare the crust ahead of time?
Absolutely! Prepare and refrigerate the crust for up to two days. Just let it sit at room temperature for a few minutes before rolling it out. -
Why is my pie crust tough?
Tough pie crust usually results from overworking the dough. Mix until just combined, and handle it as little as possible. Chilling your dough before rolling also helps.
Wrapping Up
Cooking is more than just following a recipe—it’s about creating cherished moments and savoring the flavors of life. This cherry pie recipe is not only a delightful treat but also an opportunity to connect with family and friends through shared experiences. So, roll up your sleeves, gather your ingredients, and let the aroma of baked cherries fill your home. Happy baking!
PrintClassic Cherry Pie
A delightful cherry pie that captures the essence of summer with its sweet and tart filling, all encased in a golden, flaky crust.
- Prep Time: 15 minutes
- Cook Time: 35 minutes
- Total Time: 50 minutes
- Yield: 8 servings 1x
- Category: Dessert
- Method: Baking
- Cuisine: American
- Diet: Vegetarian
Ingredients
- 2 cups fresh or frozen cherries
- 1 cup sugar
- 2 tablespoons cornstarch
- 1 tablespoon lemon juice
- 1 teaspoon vanilla extract
- 1/4 teaspoon almond extract
- 1 tablespoon butter
- 1 package pie crusts (or homemade)
- 1 egg (for egg wash)
Instructions
- Preheat the oven to 425°F (220°C).
- Mix the cherries, sugar, cornstarch, lemon juice, vanilla extract, and almond extract in a bowl.
- Roll out one pie crust and place it in a pie dish.
- Pour the cherry mixture into the prepared crust.
- Cover with the second pie crust and seal the edges.
- Create steam vents by cutting slits in the top crust.
- Brush the top crust with beaten egg.
- Bake for 30-35 minutes or until golden brown.
- Cool before serving.
Notes
Pair with vanilla ice cream or whipped cream for an extra treat. Store leftovers in the refrigerator for up to four days.
Nutrition
- Serving Size: 1 slice
- Calories: 280
- Sugar: 20g
- Sodium: 150mg
- Fat: 12g
- Saturated Fat: 5g
- Unsaturated Fat: 7g
- Trans Fat: 0g
- Carbohydrates: 40g
- Fiber: 2g
- Protein: 2g
- Cholesterol: 40mg