
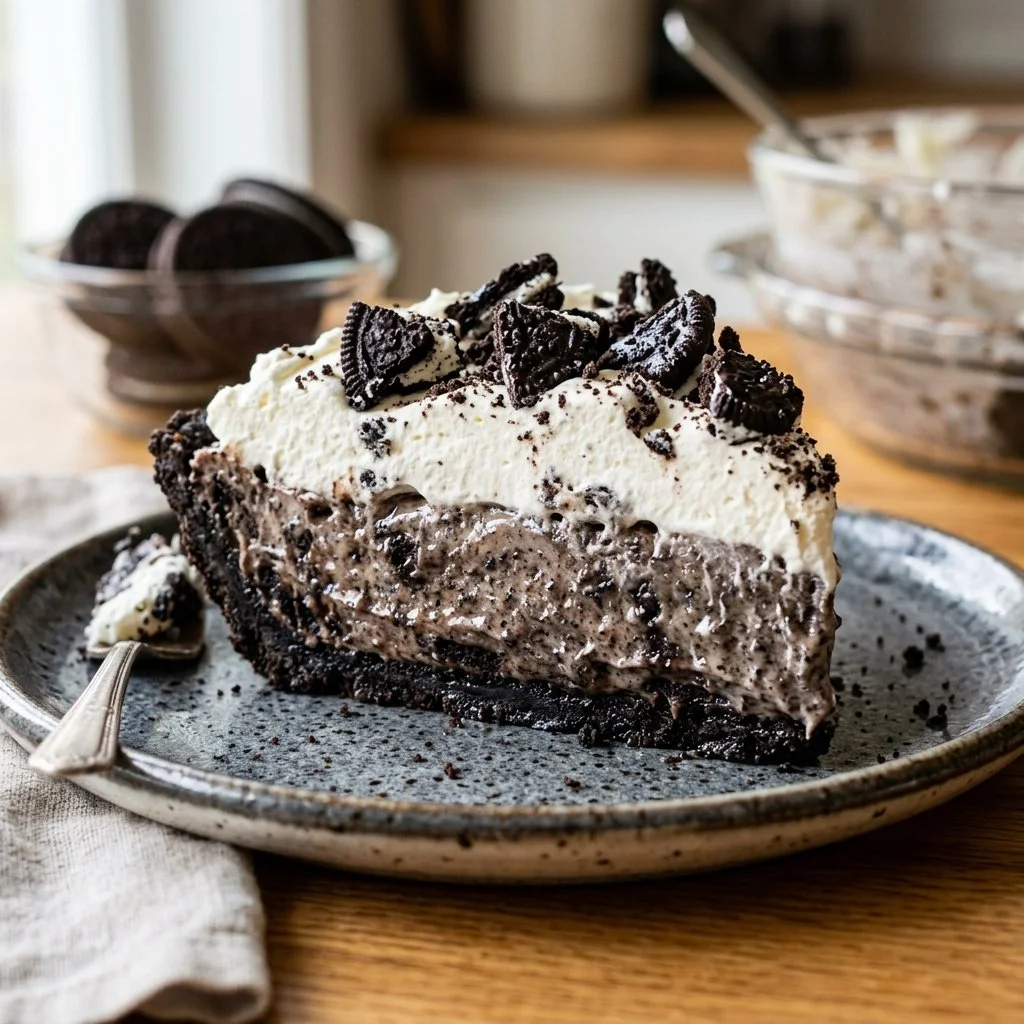
There’s something undeniably nostalgic about Oreos. From childhood after-school snacks to late-night indulgences, these beloved cookies have a way of not only satisfying a sweet craving but also evoking warm memories. One of my fondest recollections is of my cousins and I gathered around the kitchen table, preparing our "secret recipe" creations – with Oreos usually as the star. That love for these cookies evolved into a passion for cooking and baking, and what better way to celebrate them than with a No Bake Oreo Pie? This easy dessert allows you to enjoy those familiar flavors, layered with luscious creaminess, without even turning on the oven. It’s a delightful treat you can whip up for any gathering, even if it’s just for you!
Recipe Timing
- Prep Duration: 20 minutes
- Active Cooking: 15 minutes
- Total Duration: 4 hours 20 minutes (includes chilling time)
- Portion Size: 8 servings
- Complexity: Simple
Nutritional Recipe
- Calories per portion: Approximately 320
- Protein: 4g
- Carbs: 42g
- Fats: 16g
- Fiber: 1g
- Sugars: 22g
- Sodium: 220mg
Why You’ll Love This No Bake Oreo Pie
This No Bake Oreo Pie is the perfect blend of simplicity and indulgence. Creamy, sweet, and satisfyingly chocolaty, it strikes all the right notes. The crust is made entirely from crushed Oreos, marrying that rich chocolate flavor with a luscious filling of cream cheese and whipped topping. Plus, it requires no baking, making it a fantastic option for those warm days when you want dessert but don’t want to heat up the kitchen. This pie also impresses guests at parties, thanks to its luscious layers and the delightful presentation of drizzled chocolate and crumbled Oreos on top. It’s a dessert that beckons to be shared, yet feels just as comforting enjoyed solo.
The Complete Cooking Journey
Making this No Bake Oreo Pie isn’t just about following a recipe; it’s an enjoyable process that transforms simple ingredients into a delightful treat. Let’s dive into the steps!
Ingredients:
- 24 Oreo cookies
- 1/4 cup unsalted butter, melted
- 1 cup cream cheese, softened
- 1 cup powdered sugar
- 2 cups whipped topping
- 1 cup chocolate syrup
- Oreo crumbs for garnish
Method:
Step 1: Create the Oreo Crust
Start by crushing the Oreo cookies in a food processor until they resemble fine crumbs. Combine the crushed cookies with the melted butter until the mixture is well combined. Press this mixture firmly into the bottom of a pie dish to create a deliciously chocolatey crust.
Step 2: Prepare the Creamy Filling
In a mixing bowl, combine the softened cream cheese and powdered sugar. Blend until you achieve a smooth consistency. This step is crucial for getting that velvety texture you desire. Once fully mixed, gently fold in the whipped topping until well combined, taking care to keep the mixture light and fluffy.
Step 3: Assemble the Pie
Carefully pour the creamy filling into the Oreo crust you’ve just made. Spread it evenly using a spatula, ensuring every bite will have that rich filling.
Step 4: Add the Sweet Toppings
Drizzle chocolate syrup generously over the top of the pie, creating a luscious finish. Then, for a bit of crunch and a pop of flavor, sprinkle with extra Oreo crumbs. This not only adds depth but also makes for a beautiful presentation.
Step 5: Chill & Serve
Now for the hardest part—waiting! Refrigerate your pie for at least 4 hours, or until it’s set. Once it’s ready, slice it up and serve chilled. Trust me, the wait will be worth it!
Serving Suggestions & Pairings
This No Bake Oreo Pie is delicious on its own, but there are plenty of ways to elevate the experience. Serve it with whipped cream on top or a scoop of vanilla ice cream for an extra special treatment. Fresh fruit, like strawberries or raspberries, will add a colorful and tart contrast to the sweetness of the pie. If you like a little crunch, consider a sprinkle of chopped nuts for texture.
Storage & Leftovers Guide
If you have any delicious pie left over, you can store it in the refrigerator for up to 4-5 days. Be sure to cover it well to maintain freshness. If you prefer, individual slices can be wrapped in plastic wrap and frozen for future indulgence—perfect for those late-night cravings.
Kitchen Wisdom & Success Tips
- Softening Cream Cheese: To quickly soften cream cheese, cut it into cubes and let it sit at room temperature for about 30 minutes.
- Oreo Variations: Experiment with different Oreo flavors, like mint or peanut butter, for a unique twist on this classic.
- Avoid Overmixing: When folding in the whipped topping, use gentle motions to keep the filling airy and light.
- Chill Time: If you’re short on time, even an hour or two in the fridge can suffice, but the longer, the better the texture.
- Presentation: Get creative with your garnishing—consider using a piping bag to create decorative swirls with whipped cream.
Flavor Variations & Adaptations
While the classic version is pure indulgence, feel free to experiment! Add a layer of peanut butter or caramel sauce between the crust and filling, or incorporate crushed candy bars for a fun crunch. For a dairy-free version, substitute cream cheese with a dairy-free alternative, and use coconut whipped cream in place of regular whipped topping.
Reader Questions & Solutions
-
Can I use low-fat cream cheese?
Absolutely! Just keep in mind that the texture may be a little different, but it will still taste great. -
What if I don’t have a food processor?
No problem! You can place the cookies in a zip-top bag and crush them with a rolling pin until they are finely ground. -
How can I make this pie ahead of time?
This dessert is perfect for making ahead! Just prepare it the day before and let it set in the fridge overnight. -
Can I use Greek yogurt instead of cream cheese?
While you can use Greek yogurt for a lighter option, the flavor and texture will differ. Consider mixing it with cream cheese for the best results. -
What if I want to make it for a large group?
You can easily double the recipe and use a large baking dish or multiple pie dishes. Just adjust the chilling time as needed.
Wrapping Up
Cooking is all about joy and creativity, and this No Bake Oreo Pie embodies both. With its delightful crunch from the Oreo crust, rich creamy filling, and decadent chocolate drizzle, it’s a dessert that’s bound to become a beloved recipe in your collection. Whether you’re sharing it with friends or enjoying it solo, it’s an experience filled with flavor, fun, and a touch of nostalgia. So gather your ingredients, channel your inner pastry chef, and treat yourself to a slice of happiness—after all, you deserve it! Happy baking!
PrintNo Bake Oreo Pie

A deliciously creamy No Bake Oreo Pie featuring a crust made from crushed Oreo cookies and a rich cream cheese filling, topped with chocolate syrup.
- Prep Time: 20 minutes
- Cook Time: 15 minutes
- Total Time: 260 minutes
- Yield: 8 servings 1x
- Category: Dessert
- Method: No Bake
- Cuisine: American
- Diet: Vegetarian
Ingredients
- 24 Oreo cookies
- 1/4 cup unsalted butter, melted
- 1 cup cream cheese, softened
- 1 cup powdered sugar
- 2 cups whipped topping
- 1 cup chocolate syrup
- Oreo crumbs for garnish
Instructions
- Create the Oreo Crust: Crush Oreo cookies in a food processor until fine crumbs. Combine with melted butter; press firmly into a pie dish.
- Prepare the Creamy Filling: In a bowl, mix cream cheese and powdered sugar until smooth. Fold in whipped topping gently.
- Assemble the Pie: Pour filling into the crust, spreading evenly with a spatula.
- Add the Sweet Toppings: Drizzle chocolate syrup on top and sprinkle with Oreo crumbs for garnish.
- Chill & Serve: Refrigerate for at least 4 hours until set, then slice and serve chilled.
Notes
Chill the pie for longer for better texture. Can be made ahead of time and stored in the fridge.
Nutrition
- Serving Size: 1 slice
- Calories: 320
- Sugar: 22g
- Sodium: 220mg
- Fat: 16g
- Saturated Fat: 8g
- Unsaturated Fat: 6g
- Trans Fat: 0g
- Carbohydrates: 42g
- Fiber: 1g
- Protein: 4g
- Cholesterol: 30mg