
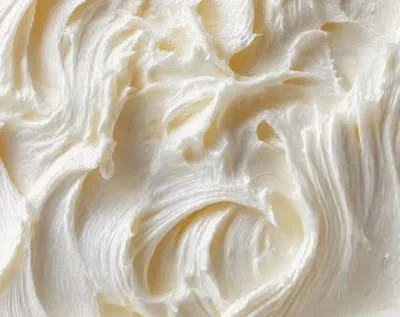
There’s something magical about homemade ice cream, especially when it comes to crafting a classic flavor like vanilla. The first time I made my own ice cream, I remember being enveloped in a whirlwind of anticipation as the gentle hum of the ice cream maker filled the kitchen. It wasn’t just about creating a sweet treat; it was a trip down memory lane, recalling summertime visits to the local ice cream parlor with my family. Nothing compares to the creamy richness of freshly made vanilla ice cream, its subtle sweetness perfectly balanced and buttery—an experience that stores-bought ice cream can never replicate.
Whether it’s served in a cone, topped with your favorite sauces, or enjoyed straight from the tub, homemade vanilla ice cream is a joyous, nostalgic delight that turns any moment into a celebration.
Recipe Timing
- Prep Duration: 10 minutes
- Active Cooking: 20-25 minutes (if using an ice cream maker)
- Total Duration: 4 hours 10 minutes (or 6 hours for no-churn method)
- Portion Size: About 6 servings
- Complexity: Simple
Nutritional Recipe
- Calories per portion: Approximately 350
- Protein: 4 grams
- Carbs: 30 grams
- Fats: 25 grams
- Fiber: 0 grams
- Sugars: 24 grams
- Sodium: 50 mg
Why You’ll Love This Homemade Vanilla Ice Cream
This homemade vanilla ice cream captures the essence of simplicity and indulgence. Each scoop provides a velvety texture and an aromatic burst of real vanilla, whether it’s from an extract or the seeds of a fresh vanilla bean. It’s versatile enough to pair beautifully with a warm slice of pie, yet comforting enough to enjoy all on its own. The satisfaction of making something from scratch adds an extra layer of joy, turning a simple dessert into a cherished experience and giving you a reason to savor each bite.
The Complete Cooking Journey
Ready to embark on the journey of ice cream making? Allow this article to guide you through each delightful step, transforming mere ingredients into something indulgent and unforgettable.
Ingredients:
- 2 cups heavy cream
- 1 cup milk
- 3/4 cup granulated sugar
- 1 tablespoon vanilla extract or 1 vanilla bean
- Pinch of salt
Method:
Step 1: Mixing the Creamy Base
In a medium bowl, whisk together heavy cream, milk, sugar, vanilla extract (or the seeds scraped from a vanilla bean), and a pinch of salt. Blend until the sugar is fully dissolved, and you start to feel that rich, sweet aroma enveloping you.
Step 2: Churning Your Ice Cream
If you’re using an ice cream maker, pour the mixture into the machine and churn according to the manufacturer’s instructions—typically about 20-25 minutes. Watch as it transforms from a liquid into a soft, fluffy mixture.
Step 3: Freezing for Firmness
Transfer the churned ice cream to a lidded container. For optimal firmness, freeze for at least 4 hours, allowing it to set properly. If you’re using a no-churn method, simply pour the mixture into a lidded container and freeze for around 6 hours or until completely firm.
Step 4: Enjoying Your Creation
Once your ice cream is firm, it’s time to serve! Scoop it into bowls, cones, or straight from the container—there’s no judgment here!
Serving Suggestions & Pairings
This vanilla ice cream is a perfect companion for a warm slice of apple pie or chocolate cake. You can drizzle it with chocolate or caramel sauce, or sprinkle it with fresh berries. For a refreshing twist, consider topping it with zesty lime or orange zest. Alternatively, mix in some crushed cookies or nuts for texture.
Storage & Leftovers Guide
Store your homemade ice cream in an airtight container to minimize ice crystal formation. It should last up to two weeks in the freezer, but trust me, it probably won’t last that long!
Kitchen Wisdom & Success Tips
- Use high-quality vanilla extract or fresh vanilla beans for the best flavor.
- Ensure your bowl and ice cream machine parts are thoroughly chilled—this ensures a creamier texture.
- If using a no-churn method, stir the mixture every 30 minutes during the first two hours of freezing to help incorporate air and achieve a lighter texture.
Flavor Variations & Adaptations
Feeling adventurous? You can easily transform this classic vanilla recipe by adding mix-ins like crushed Oreos, chocolate chips, or swirl in some fresh fruit puree. For a richer flavor, consider adding a tablespoon of whiskey or bourbon to the mixture!
Reader Questions & Solutions
-
What if I don’t have an ice cream maker?
No problem at all! You can simply pour the mixture into a lidded container and freeze it, stirring every 30 minutes for the first few hours. -
Can I use a sugar substitute?
Yes, feel free to use alternative sweeteners, but be aware that they may affect the texture. -
How can I get a softer ice cream?
Add a tablespoon of vodka to the mixture before freezing; this will lower the freezing point slightly, making it softer and easier to scoop. -
What if my ice cream has ice crystals?
This usually happens due to air not being incorporated properly. Stir it every so often during the initial freezing phase. -
Can I make this dairy-free?
Absolutely! Substitute the dairy products with full-fat coconut milk and almond milk—a delicious alternative!
Wrapping Up
Making your own homemade vanilla ice cream is not just a cooking task; it’s a way to create sweet memories, savoring the joys of life one delicious spoonful at a time. So, roll up your sleeves, gather your ingredients, and dive into this delightful recipe. Whether you choose to enjoy it alone or share with loved ones, each scoop of your homemade creation will bring a smile to anyone’s face. Gradually, you may just find yourself wondering why you ever settled for store-bought ice cream again. Happy churning!
PrintHomemade Vanilla Ice Cream
Indulge in the creamy richness of homemade vanilla ice cream, capturing the essence of nostalgia and simplicity.
- Prep Time: 10 minutes
- Cook Time: 25 minutes
- Total Time: 250 minutes
- Yield: 6 servings 1x
- Category: Dessert
- Method: Churning
- Cuisine: American
- Diet: Vegetarian
Ingredients
- 2 cups heavy cream
- 1 cup milk
- 3/4 cup granulated sugar
- 1 tablespoon vanilla extract or 1 vanilla bean
- Pinch of salt
Instructions
- Whisk together heavy cream, milk, sugar, vanilla extract (or the seeds scraped from a vanilla bean), and a pinch of salt until sugar is dissolved.
- Pour the mixture into the ice cream maker and churn according to the manufacturer’s instructions (approximately 20-25 minutes).
- Transfer churned ice cream to a lidded container and freeze for at least 4 hours for optimal firmness.
- Serve in bowls, cones, or straight from the container.
Notes
For variations, consider adding mix-ins like crushed Oreos or fresh fruit puree. Store in an airtight container for up to two weeks.
Nutrition
- Serving Size: 1 serving
- Calories: 350
- Sugar: 24g
- Sodium: 50mg
- Fat: 25g
- Saturated Fat: 15g
- Unsaturated Fat: 10g
- Trans Fat: 0g
- Carbohydrates: 30g
- Fiber: 0g
- Protein: 4g
- Cholesterol: 100mg


