
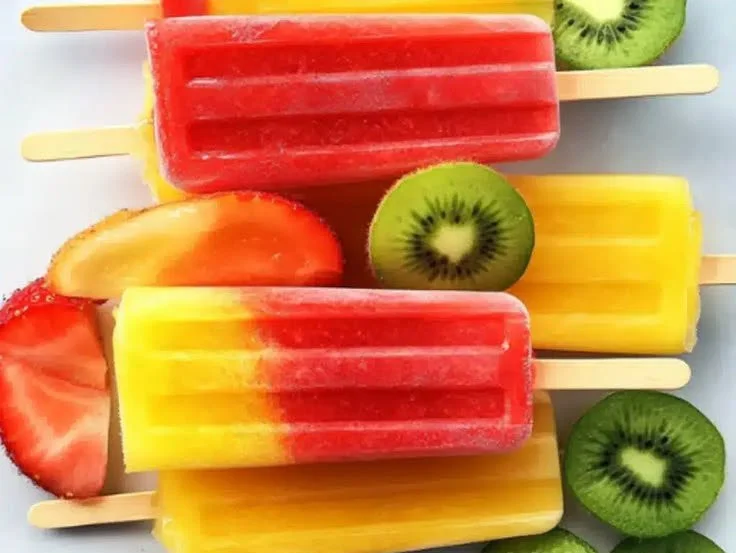
There’s something truly magical about summer days, and as a child, few things brought me as much joy as the simple pleasure of a cold popsicle on a hot afternoon. Growing up, my family would often whip up our favorite treats using whatever fruit was in season, a splash of sunshine and laughter accompanying every tasty bite. Those moments have stayed with me, fueling my passion for creating delicious and wholesome treats in my own kitchen. Today, I want to share that joy with you through a fun and colorful recipe for Easy DIY Fruit Popsicles that are not only refreshing but also nutritious!
Recipe Timing
- Prep Duration: 10 minutes
- Active Cooking: 0 minutes
- Total Duration: 4-6 hours (including freezing)
- Portion Size: Makes about 6 popsicles
- Complexity: Simple
Nutritional Recipe
- Calories per portion: Approximately 70 calories
- Protein: 1.5 grams
- Carbs: 15 grams
- Fats: 2 grams
- Fiber: 1 gram
- Sugars: 10 grams
- Sodium: 10 mg
Why You’ll Love This Easy DIY Fruit Popsicles
These Easy DIY Fruit Popsicles are the epitome of what summer treats should be: bright, flavorful, and made with simple, wholesome ingredients! They’re not just a delightful way to cool off; they also encourage creativity in the kitchen. The opportunity to experiment with combinations of fresh fruits means that each batch can be uniquely yours, making them a fantastic activity to enjoy with kids or friends. Plus, you’ll feel great knowing exactly what’s inside them—no artificial flavors or dyes!
The Complete Cooking Journey
Get ready to embark on a flavorful adventure as we whip up these popsicles! Only a few simple steps will take you from fresh fruits bursting with sweetness to a frozen treat that screams happiness on a stick. Gather your ingredients and let’s dive into the wonderful world of DIY popsicles.
Ingredients:
- Fresh fruit (such as strawberries, blueberries, mangoes)
- Yogurt or coconut milk
- Honey or agave syrup
- Lime juice
Method:
Step 1: Blend the Fresh Fruit
Start by adding your selected fruits (be it vibrant strawberries, luscious mangoes, or tart blueberries) to a blender along with your yogurt or coconut milk. Blend until you achieve a smooth, creamy texture that showcases the beautiful colors of your fruit.
Step 2: Sweeten Your Mixture
Next, it’s time to taste and adjust! Stir in honey or agave syrup to add just the right amount of sweetness, followed by a splash of lime juice to elevate the flavors and add a delightful hint of tartness.
Step 3: Pour into Popsicle Molds
Carefully pour the smooth fruit mixture into popsicle molds, filling them about three-quarters of the way full to allow for expansion as they freeze. Don’t forget to insert the sticks in the center before placing them in the freezer!
Step 4: Freeze Until Solid
Now, patience is key! Allow your popsicles to freeze for at least 4-6 hours, or until they’re completely solid. The longer, the better—just resist the urge to sneak a taste until they’re ready!
Step 5: Release and Enjoy
Once your pup pops are frozen, it’s the moment of truth! To release them a little easier, run warm water over the outside of the popsicle molds for a few seconds. Then, gently tug on the sticks, and voila! Your refreshing creations are ready to enjoy.
Serving Suggestions & Pairings
Serve these delightful popsicles at a summer gathering or simply enjoy them as a refreshing snack during the day. They pair beautifully with a light salad or even a scoop of homemade sorbet. You could also set up a toppings station with options like shredded coconut, granola, or fresh mint to elevate your popsicle experience!
Storage & Leftovers Guide
These popsicles can be kept in the freezer for up to two weeks, making them a convenient grab-and-go treat. Store them in an airtight container for maximum freshness, ensuring they don’t acquire any unwanted freezer flavors. Simply pop out a couple whenever you need a cool refreshment!
Kitchen Wisdom & Success Tips
- Use Ripe Fruits: The riper the fruit, the sweeter and more flavorful your popsicles will be.
- Mix It Up: Feel free to combine different fruits for added texture and flavor. A blend of mango and coconut milk is particularly heavenly!
- Don’t Skimp on the Lime: The acidity from lime juice not only balances the sweetness but also enhances the overall flavor of the popsicles.
Flavor Variations & Adaptations
Try adding other ingredients for fun variations! You could mix in spinach for added nutrition (the color blends away perfectly), or even use different flavored yogurt for a creamier texture. Consider adding herbs like basil or mint for a refreshing twist as well!
Reader Questions & Solutions
-
Can I use frozen fruit instead of fresh?
Absolutely! Just make sure to thaw the fruit a bit before blending to achieve a smooth consistency. -
What if I don’t have popsicle molds?
No problem! Use paper cups and popsicle sticks instead. Just pour your mixture into the cups and insert sticks once they’re partially frozen. -
How can I make these dairy-free?
Simply replace yogurt with coconut milk or any plant-based yogurt variety and you’re set! -
Is there a way to make these less sweet?
Yes! You can reduce the amount of honey or agave syrup, or omit it altogether if your fruit is sweet enough. -
Can I add other toppings or mix-ins?
Definitely! Chopped nuts or small pieces of fruit blended in can add a nice texture and surprise elements to each bite.
Wrapping Up
Making your own Easy DIY Fruit Popsicles is a joyful and fulfilling kitchen adventure that’s perfect for chasing away the summer heat. With simple ingredients and endless possibilities, you get to create a delicious treat that’s tailored to your taste and dietary preferences. So go ahead, dive into this fun recipe, and let your taste buds dance in delight! Happy blending and freezing!