
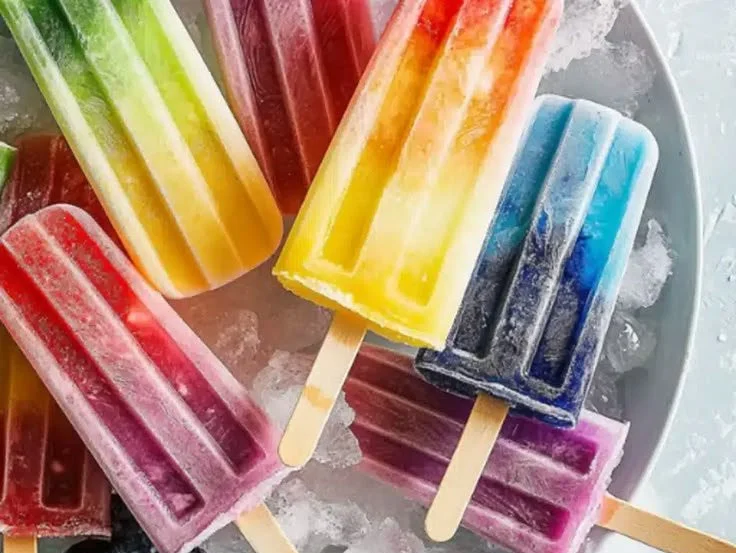
There’s something truly magical about summer afternoons, especially when they invite tiny hands to create vibrant masterpieces from fresh fruits and tangy lemonade. I remember one sweltering day when my kids and I decided to beat the heat by crafting our own Rainbow Popsicles. The kitchen soon transformed into a colorful wonderland, bursting with laughter and excitement as we mixed, poured, and tasted along the way. Each layer of fruit was like a new chapter in our culinary adventure, and the end result was not only delicious but also a kaleidoscope of colors. These popsicles became a staple in our home, and I can’t wait for you to experience the joy they bring!
Recipe Timing
- Prep Duration: 15 minutes
- Active Cooking: 5 minutes
- Total Duration: 4 hours (to freeze)
- Portion Size: Makes 10 popsicles
- Complexity: Simple
Nutritional Recipe
- Calories per portion: 50
- Protein: 0g per serving
- Carbs: 12g per serving
- Fats: 0g per serving
- Fiber: 1g per serving
- Sugars: 3g per serving
- Sodium: 5mg per serving
Why You’ll Love This Rainbow Popsicles
These Rainbow Popsicles are not just a refreshing treat; they’re a canvas for creativity! You can showcase your favorite fruits, whether it’s sun-ripened strawberries, sweet peaches, or zesty limes. Plus, they’re a clever way to keep things light and healthy, thanks to sugar-free lemonade and your choice of fresh, nutritious fruits. Each popsicle harmony of flavors explodes in your mouth, and what’s better? They can brighten up even the dullest summer day!
The Complete Cooking Journey
Creating these popsicles is as rewarding as it is fun. The simplicity of combining fruits with lemonade invites everyone into the kitchen, sparking joy as they swirl and mix while eagerly anticipating their colorful treats. Plus, the homemade nature of these popsicles means no artificial flavors—just pure, fruity goodness.
Ingredients:
- 3 cups sugar-free lemonade or diet lemon soda
- 2.5 cups diced fruit (like strawberries, blueberries, kiwi, and mango)
Method:
Step 1: Gather Your Ingredients
Start by inviting your favorite fruits to the party! Wash and dice them into bite-sized pieces. Consider the rainbow—use vibrant strawberries for red, juicy blueberries for blue, tangy pineapple for yellow, and refreshing kiwi for green!
Step 2: Choose Your Popsicle Molds
Select your popsicle molds, and make sure they’re clean and ready for action. You can use traditional molds or even small paper cups with wooden sticks.
Step 3: Create the Fruit Layers
Begin layering your fruit in the molds. Add a tablespoon or two of your diced fruit into each mold. Don’t worry about making them perfect; the more rustic, the more fun they look!
Step 4: Pour the Lemonade
Slowly pour sugar-free lemonade or diet lemon soda into each mold. Fill them up to just about the top of the fruit layers. Watch as the lemonade hugs each piece of fruit, creating a delightful visual treat.
Step 5: Insert Sticks and Freeze
If using traditional molds, insert the popsicle sticks. If you’re using cups, just place a stick in the center. Pop them into the freezer and let them chill for at least four hours, or until completely solid.
Step 6: Remove and Enjoy!
Once they’ve frozen solid, it’s time for the fun part. To remove the popsicles, run warm water over the outside of the mold for a few seconds. Pull gently on the stick, and voilà—your Rainbow Popsicles are ready to enjoy!
Serving Suggestions & Pairings
Serve these popsicles on a sunny afternoon at a family gathering, or even at a birthday party for a vibrant twist. Pair them with a light snack like cheese and crackers, or enjoy them alongside a refreshing summer salad. They make an adorable dessert after a barbecue, too!
Storage & Leftovers Guide
Store any leftover popsicles in an airtight container or a zip-top bag in the freezer, where they can last for up to 2 months. Keep in mind that they will retain their beautiful flavors but may lose a bit of their original texture if frozen for too long.
Kitchen Wisdom & Success Tips
- Fruit Selection: The best part about these popsicles? Mix and match whatever fruits you have on hand.
- Layering: For an extra fun presentation, alternate layers of different fruits.
- Sweetness: Taste as you go! If your fruits aren’t as sweet, consider adding a touch of honey or agave when mixing.
Flavor Variations & Adaptations
Feel free to experiment! Try these with coconut water instead of lemonade for a tropical twist. You can use sparkling soda for a fizzy pop sensation or add fresh mint for an even more refreshing flavor. The possibilities are endless!
Reader Questions & Solutions
-
Can I use frozen fruit?
Absolutely! Just slightly thaw them before layering to retain their shape. -
What if I don’t have sticks?
Use spoons or even toothpicks as a makeshift stick. The kids will love it! -
Can I use other beverages besides lemonade?
Yes, use juices, flavored waters, or even tea for different taste profiles. -
How do I get the popsicles out of the mold?
Run warm water over the mold and gently twist while pulling on the stick. -
Are these good for kids?
They’re perfect! Low in calories and sugar, plus packed with nutrients from the fruit.
Wrapping Up
Creating Rainbow Popsicles is not just about making a treat; it’s a delightful affair filled with laughter and joy. Whether it’s a weekend project with the kids or a refreshing snack to cool down, these popsicles allow you to share a splash of color and flavor in every bite. So let your culinary creativity shine, and dive into the delicious world of homemade popsicles! Enjoy every moment and every bite—you’ve earned it!
PrintRainbow Popsicles
Colorful and refreshing Rainbow Popsicles made with fresh fruits and sugar-free lemonade, perfect for summer days.
- Prep Time: 15 minutes
- Cook Time: 5 minutes
- Total Time: 240 minutes
- Yield: 10 popsicles 1x
- Category: Dessert
- Method: Freezing
- Cuisine: American
- Diet: Vegetarian
Ingredients
- 3 cups sugar-free lemonade or diet lemon soda
- 2.5 cups diced fruit (like strawberries, blueberries, kiwi, and mango)
Instructions
- Gather your ingredients. Wash and dice your fruits into bite-sized pieces.
- Choose your popsicle molds, ensuring they’re clean and ready for action.
- Create the fruit layers by adding diced fruit into each mold.
- Pour the lemonade slowly into each mold, filling it to the top of the fruit layers.
- Insert popsicle sticks and freeze for at least four hours or until solid.
- Remove the popsicles by running warm water over the mold and pulling gently on the stick.
Notes
These popsicles can be made with any fruit combination you have on hand. Feel free to experiment with flavors.
Nutrition
- Serving Size: 1 popsicle
- Calories: 50
- Sugar: 3g
- Sodium: 5mg
- Fat: 0g
- Saturated Fat: 0g
- Unsaturated Fat: 0g
- Trans Fat: 0g
- Carbohydrates: 12g
- Fiber: 1g
- Protein: 0g
- Cholesterol: 0mg