
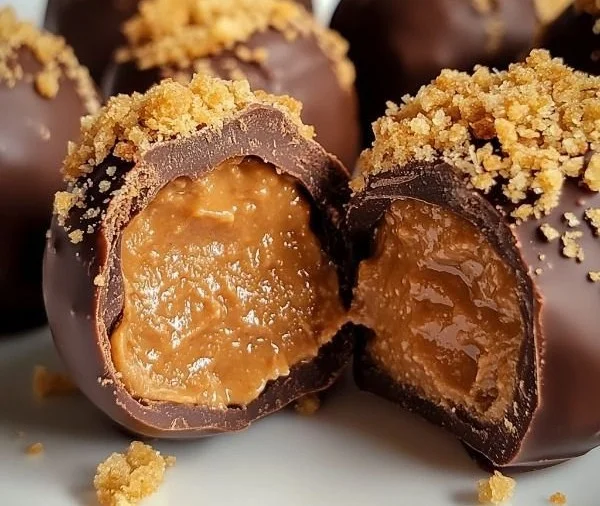
There’s something magical about transforming simple ingredients into a delightful treat that makes your mouth water. I can still remember the first time I took a bite of a Butterfinger candy bar—the combination of crunchy peanut butter and chocolate was pure bliss! Recently, I decided to recreate that experience in my kitchen in a new way, and thus, my Homemade Butterfinger Balls were born. Not only are they a delicious nod to a childhood favorite, but they’re also ridiculously easy to make. Imagine biting into a smooth, creamy ball, coated in luscious chocolate, with sweet, crunchy bits scattered throughout.
Recipe Timing
- Prep Duration: 15 minutes
- Active Cooking: 10 minutes
- Total Duration: 55 minutes (including freezing time)
- Portion Size: Makes about 20 bite-sized balls
- Complexity: Simple
Nutritional Recipe
- Calories per portion: Approximately 150 calories
- Protein: 3 grams per serving
- Carbs: 20 grams per serving
- Fats: 7 grams per serving
- Fiber: 1 gram per serving
- Sugars: 12 grams per serving
- Sodium: 80 mg per serving
Why You’ll Love This Homemade Butterfinger Balls
These Homemade Butterfinger Balls are not just a treat; they are a way to bring joy to your kitchen. They’re perfect for gatherings, quick snacks, or when you need a bit of comfort. Each bite transports you to candy paradise, combining creamy peanut butter and crunchy Butterfinger bits, all enveloped in silky chocolate. Plus, they’re great for making with kids—getting hands sticky with chocolate is all part of the fun!
The Complete Cooking Journey
Creating these little bites of happiness is like taking a sweet trip down memory lane. The process is straightforward, filled with opportunities to involve your loved ones and share laughter around the kitchen counter. Whether you’re looking to satisfy a sweet tooth or create fun treats for a group, this recipe has you covered.
Ingredients:
- 1 cup creamy peanut butter
- 2 cups crushed Butterfinger candy bars
- 1 cup powdered sugar
- 1 cup chocolate chips
- 1 tablespoon coconut oil (optional)
Method:
### Step 1: Mix Peanut Butter and Sugar
In a mixing bowl, combine the creamy peanut butter and powdered sugar until smooth. The consistency should be thick yet spreadable, creating a base that will hold all the wonderful flavors together.
### Step 2: Fold in Crunchy Goodness
Carefully fold in the crushed Butterfinger pieces until well incorporated. This step is where the magic happens; you can practically feel the excitement as the crunchy bits intermingle with the creamy peanut butter.
### Step 3: Shape Your Treats
Roll the mixture into bite-sized balls and place them on a baking sheet lined with parchment paper. This is where you can literally shape your joy—every ball is a personal touch.
### Step 4: Freeze for Firmness
Freeze the balls for about 30 minutes to firm up. This step is crucial to ensure that your treats retain their shape when you dip them in chocolate.
### Step 5: Melt Chocolate Bliss
In a microwave-safe bowl, melt the chocolate chips with coconut oil (if using) in 30-second intervals until smooth. Stir gently after each interval to achieve that glossy finish.
### Step 6: Coat with Chocolate
Dip each ball into the melted chocolate, coating it completely, and return to the baking sheet. This is the moment when they transform into irresistible little bites, soaking up that rich chocolate goodness.
### Step 7: Drizzle for Decoration
Drizzle any remaining chocolate over the balls for decoration. This not only enhances the aesthetic but also adds an extra chocolaty bite.
### Step 8: Set and Enjoy!
Let them set at room temperature or refrigerate until the chocolate hardens. Enjoy these little pieces of heaven as a snack or a party treat!
Serving Suggestions & Pairings
These Homemade Butterfinger Balls pair wonderfully with a tall glass of cold milk or a hot cup of coffee. You can even serve them alongside a fruit platter for a delightful contrast. They make fantastic party favors or a sweet addition to dessert tables during celebrations.
Storage & Leftovers Guide
Store any leftovers in an airtight container in the refrigerator for up to a week. You can also freeze them for up to three months. Just thaw them in the fridge when you’re ready to enjoy them again!
Kitchen Wisdom & Success Tips
- Use a cookie scoop for evenly shaped balls that look professional.
- If you wish to adjust the sweetness, reduce the powdered sugar slightly.
- You can substitute almond butter for a twist on the classic flavor.
Flavor Variations & Adaptations
Feel free to experiment! Try adding a sprinkle of sea salt on top of the chocolate before it sets, or mix in some chopped nuts for extra texture. You could even use different flavors of candy bars or add a hint of vanilla extract for added depth.
Reader Questions & Solutions
-
Can I use crunchy peanut butter?
- Absolutely! Crunchy peanut butter adds even more texture to the balls.
-
What can I use instead of Butterfinger?
- Any similar candy bar with a crunchy texture will work. Think Snickers or Milky Way!
-
How can I make these dairy-free?
- Use dairy-free chocolate chips, and you’re good to go!
-
What if my chocolate is too thick?
- Add a little more coconut oil to thin it out for easier dipping.
-
How can I prevent the chocolate from cracking as it hardens?
- Make sure the balls are frozen properly before dipping, and let the chocolate cool slightly before using it.
Wrapping Up
Making these Homemade Butterfinger Balls is like reliving that childhood excitement all over again. I hope you’ll take a moment to create these delightful bites and share them with those you love. This recipe isn’t just about indulgence; it’s a way to spark joy and bring people together in the kitchen. So, roll up your sleeves and get ready to savor the sweet taste of nostalgia!


