
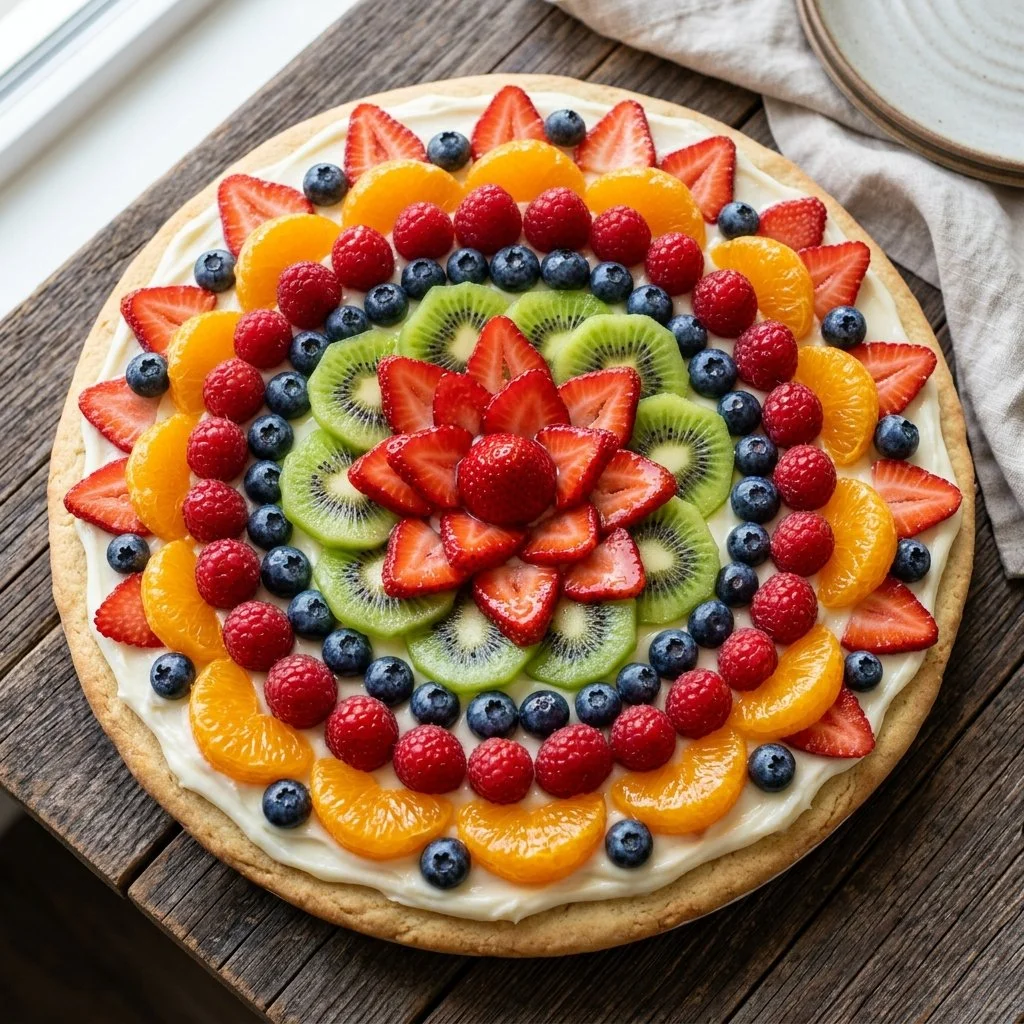
There’s something truly magical about fruit pizza that transcends the standard dessert fare. I remember my first encounter with this delightful creation at a friend’s summer barbecue. As I took my first bite, the sweet, buttery cookie crust crumbled just enough to give way to a creamy layer topped with bright, colorful fruits. Each fruit piece sang with its own sweet note, creating a symphony of flavors that danced across my palate. From that day forward, fruit pizza has held a special place in my heart—and my kitchen.
Creating your own fruit pizza not only satisfies the sweet tooth but also allows you to unleash your artistic side. Picture a vivid palette of strawberries, blueberries, and kiwi delicately arranged on a creamy canvas. This dessert is as much about presentation as it is about taste, making it perfect for parties, gatherings, or just a joyful weeknight treat for yourself or your loved ones.
Recipe Timing
- Prep Duration: 15 minutes
- Active Cooking: 10 minutes
- Total Duration: 25 minutes (plus chilling time)
- Portion Size: Serves about 8
- Complexity: Simple
Nutritional Recipe
- Calories per portion: Approximately 205 calories
- Protein: 2g
- Carbs: 26g
- Fats: 10g
- Fiber: 1g
- Sugars: 10g
- Sodium: 115mg
Why You’ll Love This Fruit Pizza
This fruit pizza is a celebration of summer flavors, blending the sweetness of fresh fruit with the richness of cream cheese and the simplicity of sugar cookie dough. It’s adaptable, allowing you to switch in seasonal fruits or add a splash of your favorite liqueur to the cream cheese mixture. Plus, it’s a feast for the eyes—perfect for impressing guests and satisfying your own creative inclinations.
The Complete Cooking Journey
Embarking on this fruity adventure is a breeze! You’ll start by prepping the cookie dough, shifting to the creamy layer, and finally, arranging the fruits to your heart’s desire. This step-by-step process ensures that everyone can partake in the joy of making their own fruit pizza, from the youngest bakers in the family to the seasoned cooks.
Ingredients:
- 1 sugar cookie dough
- 8 oz cream cheese, softened
- 1/2 cup powdered sugar
- 1/2 tsp vanilla extract
- Assorted fresh fruits (e.g., strawberries, kiwi, blueberries, bananas)
- Optional: fruit glaze for added shine
Method:
Step 1: Preheat the Oven
Preheat the oven according to the cookie dough package instructions, opening the door to a warm embrace of sweet anticipation.
Step 2: Shape the Cookie Dough
Roll out the sugar cookie dough and press it evenly into a pizza pan, seamlessly crafting the crust that will hold your masterpiece.
Step 3: Bake the Crust
Bake according to package instructions until the crust is golden brown. Once it’s done, let it cool completely on a wire rack, filling your kitchen with the aroma of freshly baked cookies.
Step 4: Prepare the Creamy Layer
In a bowl, beat the softened cream cheese with powdered sugar and vanilla extract until the mixture turns smooth and creamy—a perfect spreadable delight.
Step 5: Spread the Cream Cheese Mixture
Once the cookie crust has cooled, generously spread the cream cheese mixture over the top, creating a luscious foundation for your fruity decorations.
Step 6: Arrange the Fresh Fruits
Artfully arrange your assorted fresh fruits on top of the cream cheese layer. Let your creativity shine—there’s no wrong way to do this!
Step 7: Add Glaze (Optional)
If desired, brush a bit of fruit glaze over the top for a shiny finish that adds an extra touch of elegance to your fruit pizza.
Step 8: Slice and Serve
Slice your fruit pizza into wedges and serve immediately, inviting everyone to enjoy their share of this colorful treat.
Serving Suggestions & Pairings
Pair your fruit pizza with a scoop of vanilla ice cream or a dollop of whipped cream for an even more indulgent experience. It also complements a glass of iced tea or lemonade beautifully, making it a refreshing choice for warm days.
Storage & Leftovers Guide
To best preserve your fruit pizza, cover any leftovers with plastic wrap and refrigerate. Enjoy it within 2-3 days for the freshest taste. If you notice the fruits starting to bleed into the cream cheese, you can keep the fruit and cream cheese separate until serving.
Kitchen Wisdom & Success Tips
- Allow the cream cheese to soften at room temperature; this will make mixing quicker and easier, resulting in a smoother texture.
- Experiment with various fruits based on what’s in season or your personal favorites—diced pineapple, peaches, or blackberries can also make delightful additions.
- If you’re short on time, store-bought fruit glaze can be an excellent shortcut to enhance the overall shine and flavor.
Flavor Variations & Adaptations
Switch up the flavors! Consider flavored cream cheese (like strawberry or lemon) or add citrus zest for an exciting twist. You can also mix in a touch of yogurt for extra creaminess or layer in some granola for crunch.
Reader Questions & Solutions
-
Can I use a different type of cookie dough?
Absolutely! Snickerdoodle or even chocolate chip cookie dough could add a delicious twist. -
What fruits work best for fruit pizza?
Berries, kiwi, and bananas are favorites, but feel free to include apples, melons, or peaches based on your taste. -
How can I prevent my fruits from browning?
Lightly brush them with lemon juice to help retain their vibrant colors. -
Can I make the crust in advance?
Yes, you can bake the crust a day ahead—just store it in an airtight container at room temperature until you’re ready to assemble. -
What if I don’t have powdered sugar?
You can blend granulated sugar in a blender or food processor until fine to create an alternative for powdered sugar.
Wrapping Up
There’s something truly special about creating and sharing a fruit pizza. Whether it’s for a family gathering, a brunch potluck, or simply to brighten your day, this dessert brings joy and a burst of color to any table. So grab your ingredients, channel your inner artist, and create a beautiful masterpiece that’s sure to please everyone. Happy baking!