
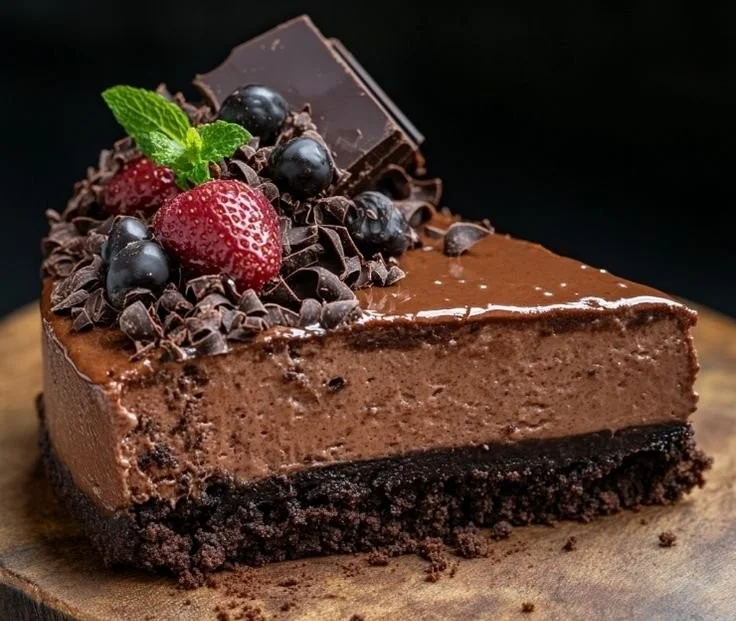
There’s something utterly magical about the idea of incorporating rich, velvety cheesecake into a busy weeknight and coming out with something as luxurious as a Triple Chocolate Cheesecake. Picture this: you’re winding down after a long day, and the sweet aroma of melting chocolate swirls through your kitchen, lifting your spirits with each gentle beckoning. That’s exactly what happened to me the first time I tried my hand at making cheesecake in my pressure cooker—it turned a seemingly complicated dessert into a delightful evening adventure.
When I brought it to a gathering of friends, I was met with reactions of pure bliss as they took their first bites. The creamy texture, paired with the deep chocolate notes, left everyone wondering how something so decadent could be made with such little fuss. Today, I’m thrilled to share my simple yet sensational recipe for Triple Chocolate Cheesecake in the Pressure Cooker.
Recipe Timing
- Prep Duration: 20 minutes
- Active Cooking: 60 minutes
- Total Duration: 1 hour 20 minutes
- Portion Size: Serves 12
- Complexity: Moderate
Nutritional Recipe
- Calories per portion: Approximately 400 calories
- Protein: 8 grams
- Carbs: 30 grams
- Fats: 28 grams
- Fiber: 1 gram
- Sugars: 22 grams
- Sodium: 320 mg
Why You’ll Love This Triple Chocolate Cheesecake in the Pressure Cooker
Imagine a cheesecake so smooth that it melts in your mouth—a heaven for chocolate lovers like you and me! This recipe takes the classic dessert and elevates it with three layers of chocolate goodness. Not only is the cheesecake rich and delicious, but making it in a pressure cooker cuts down the time and fuss you’d usually have with a traditional oven. It’s perfect for those cozy nights spent with loved ones or special occasions where you want to impress.
The Complete Cooking Journey
Through the magic of steam-cooking, you’ll discover how easy it is to create a moist and luscious cheesecake. Each bite melts into a symphony of chocolate harmonizing perfectly with the creamy cheesecake, making it an unforgettable treat. Let’s dive into what you need to create this spectacular dessert!
Ingredients:
- 1/4 cup unsalted butter (melted)
- 2 cups Oreo cookie crumbs (about 20 cookies)
- Salt (pinch)
- 3 packages Philadelphia Original Cream Cheese (8 ounces each, room temp)
- 8 ounces sour cream (room temperature)
- 1 1/4 cups granulated sugar
- 1/4 cup cocoa powder
- 2 teaspoons espresso powder
- 4 large eggs (room temperature)
- 1 tablespoon vanilla extract
- 8 ounces bittersweet chocolate (melted)
- 6 ounces bittersweet chocolate (finely chopped)
- 3/4 cup heavy cream
Method:
Step 1: Prepare the Crust
Start by combining the melted butter, Oreo cookie crumbs, and a pinch of salt in a bowl until fully mixed. Press this delightful mixture into the bottom of your springform pan, creating an even crust. You’ll want to pack it tightly to hold everything together!
Step 2: Mix the Creamy Filling
In a large mixing bowl, blend the cream cheese until smooth. Add in the sour cream, sugar, cocoa powder, and espresso powder and mix until creamy and combined. Don’t forget to scrape down the sides so every bit gets that rich chocolate flavor!
Step 3: Incorporate the Eggs
With your mixer on low, add the eggs one at a time, mixing well after each addition. Finally, pour in the vanilla extract and the melted bittersweet chocolate, beating until everything is perfectly harmonious.
Step 4: Add in the Chocolate Chunks
Gently fold in the finely chopped bittersweet chocolate pieces into your batter. This little touch adds bursts of delight in every bite!
Step 5: Prepare the Pressure Cooker
Pour a cup of water into your pressure cooker and grease the edges of the springform pan. Place the pan inside the cooker. Secure the lid and set to cook on high pressure for 60 minutes.
Step 6: Release and Cool
Once the cooking time is up, allow a natural release for best results. Carefully remove the cheesecake from the cooker and let it cool to room temperature before placing it in the fridge to chill for at least 4 hours.
Step 7: Whip the Cream
While your cheesecake cools, whip together the heavy cream until soft peaks form. This wonderfully creamy topping can be dolloped generously on each slice when serving!
Step 8: Serve and Indulge
Once chilled, slice up your marvelous cheesecake. Serve each slice with fluffy whipped cream, perhaps a sprinkle of cocoa, and enjoy the delight on your loved ones’ faces!
Serving Suggestions & Pairings
This delightful cheesecake pairs beautifully with a hot cup of coffee or a glass of dessert wine. You can also accessorize it with fresh raspberries or strawberries for a fruity twist, which balances the richness perfectly.
Storage & Leftovers Guide
Store any leftovers in the refrigerator covered for up to a week. You can also freeze slices for up to three months—just remember to wrap them well to maintain their deliciousness!
Kitchen Wisdom & Success Tips
- Room Temperature Ingredients: Make sure your cream cheese and sour cream are at room temperature for better mixing, yielding a smoother batter.
- Natural Release: Don’t rush the pressure release; letting it happen naturally prevents cracks in your cheesecake.
- Water Bath: Although not necessary in a pressure cooker, feel free to line the outside of the springform pan with foil for added moisture protection.
Flavor Variations & Adaptations
Feeling adventurous? Swap some Oreo crumbs for graham cracker crumbs for a different flair. You can also experiment with flavored extracts, such as almond or mint, to create unique variations!
Reader Questions & Solutions
-
Can I make this cheesecake without espresso powder?
- Absolutely! You can omit it or substitute with more cocoa powder for added chocolate flavor.
-
What should I do if my cheesecake cracks?
- A natural release helps minimize cracking. If it does crack, don’t worry! Top it with whipped cream or chocolate ganache to cover imperfections.
-
How do I know when my cheesecake is done?
- It should be set around the edges but still slightly jiggly in the center. It will firm up as it cools.
-
Can I use low-fat cream cheese?
- You can, but it may affect the creaminess and texture. Regular cream cheese gives the best results!
-
Is it necessary to chill the cheesecake overnight?
- While it can be enjoyed the same day after chilling for a few hours, overnight chilling allows the flavors to meld and intensify even more.
Wrapping Up
There you have it! An indulgent, rich, and utterly delicious Triple Chocolate Cheesecake made effortlessly in your pressure cooker. Each bite is a celebration of chocolate that will have your friends and family begging for more. Remember, cooking is about enjoying the journey—so bring your creativity into the kitchen, have fun, and savor every delightful moment. Happy cooking!
PrintTriple Chocolate Cheesecake in the Pressure Cooker

A rich and creamy triple chocolate cheesecake made effortlessly in your pressure cooker, perfect for chocolate lovers.
- Prep Time: 20 minutes
- Cook Time: 60 minutes
- Total Time: 80 minutes
- Yield: 12 servings 1x
- Category: Dessert
- Method: Pressure Cooking
- Cuisine: American
- Diet: Vegetarian
Ingredients
- 1/4 cup unsalted butter (melted)
- 2 cups Oreo cookie crumbs (about 20 cookies)
- Salt (pinch)
- 3 packages Philadelphia Original Cream Cheese (8 ounces each, room temp)
- 8 ounces sour cream (room temperature)
- 1 1/4 cups granulated sugar
- 1/4 cup cocoa powder
- 2 teaspoons espresso powder
- 4 large eggs (room temperature)
- 1 tablespoon vanilla extract
- 8 ounces bittersweet chocolate (melted)
- 6 ounces bittersweet chocolate (finely chopped)
- 3/4 cup heavy cream
Instructions
- Prepare the crust by combining melted butter, Oreo cookie crumbs, and a pinch of salt; then press into the bottom of a springform pan.
- Mix the cream cheese in a bowl until smooth; add sour cream, sugar, cocoa powder, and espresso powder, mixing until combined.
- Incorporate the eggs one at a time on low speed, then add vanilla extract and melted bittersweet chocolate, mixing until smooth.
- Add finely chopped bittersweet chocolate pieces to the batter, folding gently.
- Prepare the pressure cooker with a cup of water and grease the edges of the springform pan; place inside and secure the lid.
- Release naturally after cooking on high pressure for 60 minutes, then cool to room temperature before chilling in the fridge for at least 4 hours.
- Whip the heavy cream until soft peaks form for topping.
- Serve chilled slices topped with whipped cream and cocoa, and enjoy!
Notes
Store leftovers in the refrigerator for up to a week, or freeze slices for up to three months. Ensure ingredients are at room temperature for best results.
Nutrition
- Serving Size: 1 slice
- Calories: 400
- Sugar: 22g
- Sodium: 320mg
- Fat: 28g
- Saturated Fat: 17g
- Unsaturated Fat: 6g
- Trans Fat: 0g
- Carbohydrates: 30g
- Fiber: 1g
- Protein: 8g
- Cholesterol: 90mg


