
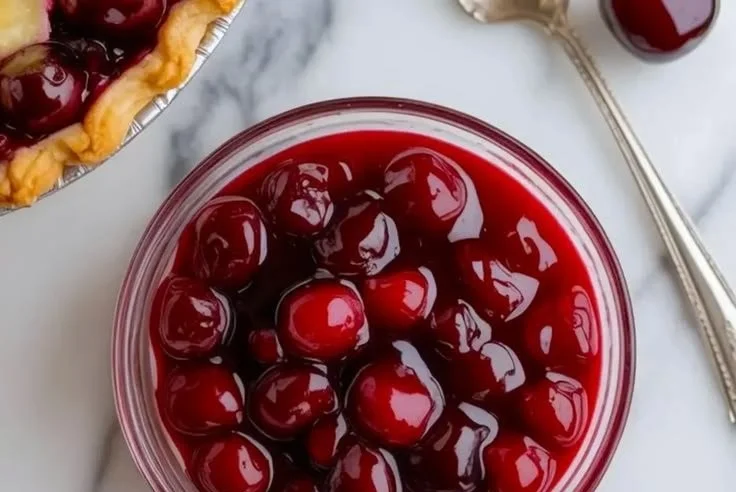
Homemade cherry pie filling is a delightful way to enjoy the sweet and tart flavor of cherries. This recipe is perfect for filling pies, tarts, or even serving over ice cream. Making your own filling allows you to use fresh ingredients and control the sweetness to your liking.
Why make this recipe
Making your own cherry pie filling is fun and rewarding. You get to enjoy the bright taste of fresh cherries without the preservatives that come in store-bought versions. Plus, it’s easy to customize the sweetness or add flavors you love. Whether you are baking a homemade pie or just want a cherry topping for dessert, this filling is a great choice.
How to make Homemade Cherry Pie Filling
Ingredients:
- Fresh cherries
- Sugar
- Cornstarch
- Lemon juice
- Vanilla extract
- Water
Directions:
- Wash and pit the fresh cherries.
- In a medium saucepan, combine the cherries, sugar, cornstarch, lemon juice, vanilla extract, and water.
- Cook over medium heat, stirring occasionally, until the mixture starts to bubble and thicken, about 5-10 minutes.
- Remove from heat and let cool before using in pies or other desserts.
How to serve Homemade Cherry Pie Filling
You can serve homemade cherry pie filling in many ways! Use it as a filling for a classic cherry pie or spoon it over cheesecake for a tasty dessert. It also tastes wonderful over pancakes or waffles for a sweet breakfast treat.
How to store Homemade Cherry Pie Filling
To store your cherry pie filling, let it cool completely. Then, place it in an airtight container and keep it in the refrigerator. It can last for about a week. If you want to keep it longer, you can freeze it. Just pour it into a freezer-safe container and it should be good for up to three months.
Tips to make Homemade Cherry Pie Filling
- Use ripe cherries for the best flavor.
- Adjust the sugar to match your taste. If you prefer it sweeter, add more sugar.
- If you want a thicker filling, increase the cornstarch slightly.
- For added flavor, you can add a pinch of almond extract along with the vanilla.
Variation
You can switch things up by using other fruits like blueberries, raspberries, or peaches. Just follow the same method and adjust the sugar based on the sweetness of the fruit you choose.
FAQs
How long does homemade cherry pie filling last?
Homemade cherry pie filling can last about a week in the fridge or up to three months in the freezer.
Can I use frozen cherries for this recipe?
Yes, you can use frozen cherries. Just thaw them first and drain any excess liquid before cooking.
Is this recipe easy for beginners?
Absolutely! This recipe is simple and straightforward, making it perfect for beginners who want to try making pie filling at home.
Homemade Cherry Pie Filling

A delightful homemade cherry pie filling perfect for pies, tarts, or as a topping for desserts.
- Prep Time: 10 minutes
- Cook Time: 10 minutes
- Total Time: 20 minutes
- Yield: 2 cups 1x
- Category: Dessert
- Method: Stovetop
- Cuisine: American
- Diet: Vegetarian
Ingredients
- 4 cups Fresh cherries, pitted
- 1 cup Sugar
- 2 tablespoons Cornstarch
- 2 tablespoons Lemon juice
- 1 teaspoon Vanilla extract
- 1/2 cup Water
Instructions
- Wash and pit the fresh cherries.
- In a medium saucepan, combine the cherries, sugar, cornstarch, lemon juice, vanilla extract, and water.
- Cook over medium heat, stirring occasionally, until the mixture starts to bubble and thicken, about 5-10 minutes.
- Remove from heat and let cool before using in pies or other desserts.
Notes
Use ripe cherries for the best flavor and adjust the sugar based on your taste. You can also add a pinch of almond extract for extra flavor.
Nutrition
- Serving Size: 1/4 cup
- Calories: 150
- Sugar: 28g
- Sodium: 5mg
- Fat: 0g
- Saturated Fat: 0g
- Unsaturated Fat: 0g
- Trans Fat: 0g
- Carbohydrates: 38g
- Fiber: 1g
- Protein: 1g
- Cholesterol: 0mg


