
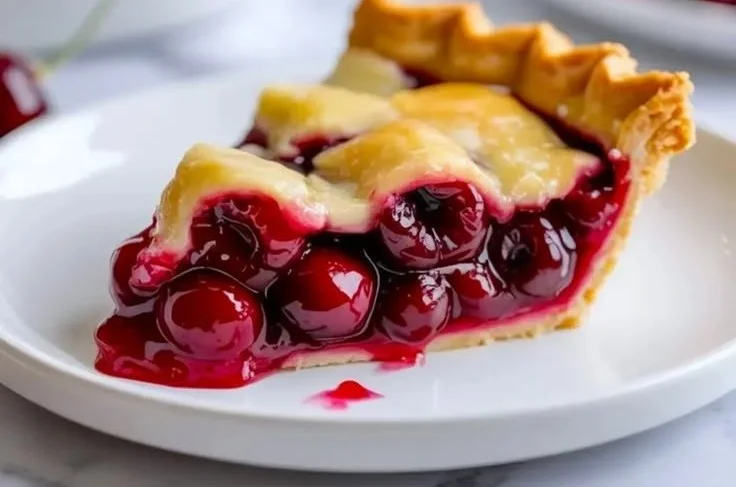
There’s something undeniably magical about a pie that boasts a homemade filling, especially when that filling brims with the sweet-tart ecstasy of fresh cherries. As the sun-soaked days of summer give way to the heartwarming scents of autumn kitchens, I can’t help but reminisce about those cherished moments spent with my grandmother, her apron dusted with flour, as we whipped up her famous cherry pie. Each bite was a slice of harmony, and the cherry filling played the star role in that delicious symphony. Now, it’s your turn to bring that joy into your own kitchen with this simple yet delightful homemade cherry pie filling.
Recipe Timing
- Prep Duration: 15 minutes
- Active Cooking: 20 minutes
- Total Duration: 35 minutes
- Portion Size: Approximately 2 cups of filling
- Complexity: Simple
Nutritional Recipe
- Calories per portion: 150
- Protein: 1g
- Carbs: 36g
- Fats: 0.5g
- Fiber: 2g
- Sugars: 30g
- Sodium: 5mg
Why You’ll Love This Homemade Cherry Pie Filling
Homemade cherry pie filling is more than just delicious; it’s an experience that enchants both the cook and the lucky tasters. Imagine biting into a warm pie, where the luscious cherry filling bursts forth with flavor—a delightful blend of sweet and tangy that dances on your palate. With the freshness of ripe cherries, a hint of vanilla, and a touch of zesty lemon, it’s the perfect homage to summer’s bounty. Plus, making it from scratch allows you to control the sweetness and texture, ensuring it’s just right for your dessert desires.
The Complete Cooking Journey
Let’s dive into the heart of the kitchen and create this cherry pie filling together! Get ready, because this delightful concoction will soon fill your home with irresistible aromas.
Ingredients:
- Fresh cherries
- Sugar
- Cornstarch
- Lemon juice
- Vanilla extract
- Salt
Method:
Step 1: Prepare Your Cherries
Pit and chop the fresh cherries. This step brightens your kitchen with the essence of summer; just imagine the vibrant red jewels waiting to be transformed.
Step 2: Create the Sweet Base
In a medium saucepan, combine the chopped cherries, sugar, and a pinch of salt over medium heat. As you stir occasionally, you’ll witness the cherries begin to release their juices, creating a luscious syrup that promises to envelop your pie in a warm embrace.
Step 3: Get the Juices Flowing
Keep stirring until the cherries have released their juices and started to bubble invitingly. This is where the magic begins; watch as the colors deepen and the smell fills your space.
Step 4: Prepare the Thickening Agent
In a separate bowl, mix the cornstarch with lemon juice and vanilla extract. Give it a good stir until smooth—this combination will help to thicken your cherry filling to perfection.
Step 5: Combine for Creamy Consistency
Add the cornstarch mixture to the cherry mixture, stirring continuously until it thickens. You’ll see it transform before your eyes into a glossy, shiny filling that is simply irresistible.
Step 6: Simmer to Perfection
Reduce the heat and let it simmer for a few minutes. This final step allows the flavors to meld beautifully, creating a filling that is rich and oh-so-full of flavor.
Step 7: Cool and Store
Remove from heat and let cool before using it in your favorite pies or other desserts. It’s hard to resist tasting it straight from the pot, but the wait will be worth it!
Serving Suggestions & Pairings
This homemade cherry pie filling isn’t just for pies—use it as a topping for pancakes, drizzled over ice cream, or mixed into yogurt for a delicious breakfast treat. Consider pairing it with a scoop of vanilla ice cream or whipped cream to balance out the tartness of the cherries.
Storage & Leftovers Guide
You can store any leftover filling in an airtight container in the refrigerator for up to 5 days. If you’re looking to keep it longer, freeze it for up to 3 months. Just thaw it overnight in the fridge before using again!
Kitchen Wisdom & Success Tips
- Use Fresh Cherries: For the best flavor, use in-season, ripe cherries.
- Adjust Sweetness: If your cherries are on the tart side, don’t hesitate to add more sugar.
- Texture Preference: If you prefer a chunkier filling, reserve some chopped cherries to fold in at the end.
- Don’t Skip the Salt: Just a pinch enhances the cherry flavor beautifully!
- Mix and Match: Experiment with adding other flavors, such as almond extract or cinnamon, for a unique twist.
Flavor Variations & Adaptations
Feeling adventurous? Try incorporating spices like nutmeg or ginger to give your filling a cozy vibe. You could also mix in other berry varieties for a delicious twist—blueberries and raspberries make a fabulous addition!
Reader Questions & Solutions
- Can I use frozen cherries?
- Absolutely! Just make sure to thaw and drain them before using them.
- What can I substitute for cornstarch?
- You can use arrowroot powder or tapioca flour as a thickener in a 1:1 ratio.
- Is this recipe gluten-free?
- Yes, it is naturally gluten-free, making it perfect for gluten-sensitive diets.
- How can I make it less sweet?
- Simply reduce the amount of sugar you add. Taste as you go!
- How can I tell if my cherries are ripe?
- Look for cherries that are dark in color and plump. If they’re sweet-smelling, they’re ready to use!
Wrapping Up
Creating your own homemade cherry pie filling is a rewarding endeavor that brings the flavors of summer into your kitchen year-round. With each step, you’re not only preparing a tasty treat but also crafting sweet memories that can be shared with family and friends. So, roll up your sleeves and let the aroma of fresh cherries inspire you to whip this up today. Whether it’s for a holiday gathering or just a weekend indulgence, you’ll find that nothing beats the flavor of homemade! Happy cooking!
PrintHomemade Cherry Pie Filling

A delightful homemade cherry pie filling that balances sweet and tart flavors, perfect for pies and desserts.
- Prep Time: 15 minutes
- Cook Time: 20 minutes
- Total Time: 35 minutes
- Yield: 2 cups of filling
- Category: Dessert
- Method: Cooking
- Cuisine: American
- Diet: Vegetarian
Ingredients
- Fresh cherries
- Sugar
- Cornstarch
- Lemon juice
- Vanilla extract
- Salt
Instructions
- Prepare your cherries by pitting and chopping them.
- Create the sweet base by combining chopped cherries, sugar, and a pinch of salt in a medium saucepan over medium heat.
- Keep stirring until the cherries have released their juices and started to bubble.
- Mix the cornstarch with lemon juice and vanilla extract in a separate bowl until smooth.
- Add the cornstarch mixture to the cherry mixture, stirring continuously until it thickens.
- Reduce the heat and let it simmer for a few minutes.
- Remove from heat and let cool before using in pies or desserts.
Notes
Use fresh, ripe cherries for the best flavor. Adjust sweetness according to your preference.
Nutrition
- Serving Size: 1/4 cup
- Calories: 150
- Sugar: 30g
- Sodium: 5mg
- Fat: 0.5g
- Saturated Fat: 0g
- Unsaturated Fat: 0g
- Trans Fat: 0g
- Carbohydrates: 36g
- Fiber: 2g
- Protein: 1g
- Cholesterol: 0mg


