
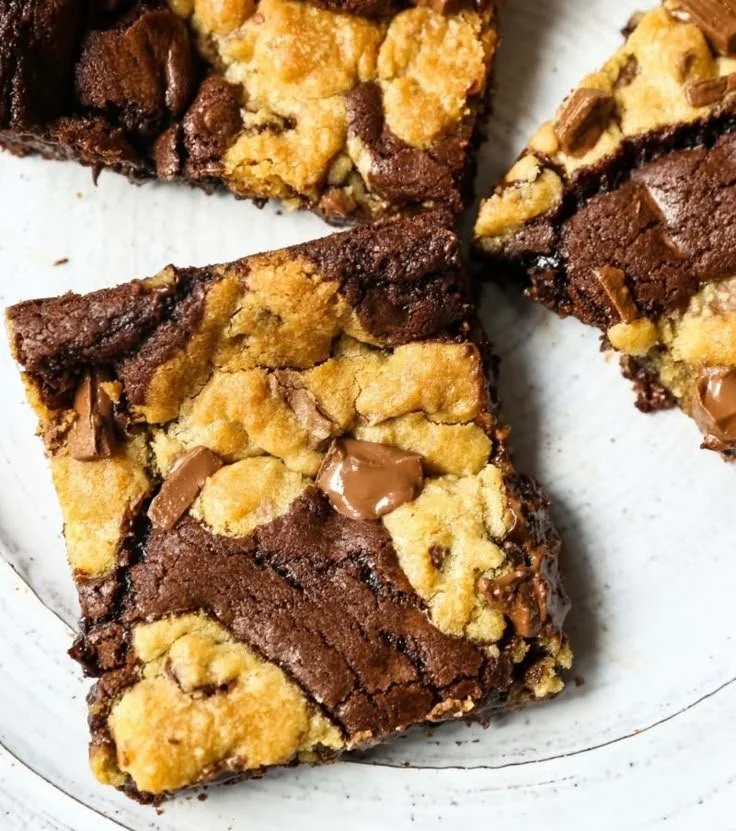
There’s something magical about being in the kitchen, especially when it comes to baking. The aroma of sweet treats wafting through the air ignites fond memories of childhood, family gatherings, and spontaneous bake-offs with friends. One of my all-time favorites that always brings that nostalgia rushing back is the delightful, dreamy fusion of brownies and cookies – the beloved Brookies. Picture this: a fudgy brownie layer lovingly cradling a buttery chocolate chip cookie layer, both equally decadent and satisfying. If you’ve ever been torn between snacking on a brownie or a cookie, Brookies are your answer, and this recipe is guaranteed to become your new go-to.
Recipe Timing
- Prep Duration: 15 minutes
- Active Cooking: 30 minutes
- Total Duration: 45 minutes
- Portion Size: Makes about 12 bars
- Complexity: Simple
Nutritional Recipe
- Calories per portion: 200 calories
- Protein: 2g per serving
- Carbs: 28g per serving
- Fats: 10g per serving
- Fiber: 1g per serving
- Sugars: 15g per serving
- Sodium: 100mg per serving
Why You’ll Love This Brookies
These Brookies combine the best of both worlds, with the rich, fudgy texture of brownies layered beneath the soft, chewy goodness of chocolate chip cookies. They’re perfect for all occasions: school bake sales, birthday parties, or simply indulging after a long day. Plus, they’re incredibly easy to make! One bite, and you’ll be transported back to simpler times, sharing laughter and sweet treats with loved ones.
The Complete Cooking Journey
Step 1: Preheat the Oven & Prepare the Baking Dish
Start by preheating your oven to 350°F (175°C) and greasing a 9×9-inch baking pan. This ensures a perfect bake and makes cleanup a breeze.
Step 2: Combine Your Sweetening Agents
In a large bowl, mix the melted butter, sugar, and brown sugar until smooth. This mixture should look glossy and inviting, almost like liquid gold!
Step 3: Incorporate the Eggs & Vanilla
Add the eggs and vanilla extract to the sugary mixture, and mix well until fully combined. The vanilla will add an aromatic touch that takes these treats to the next level.
Step 4: Sift the Dry Ingredients
In a separate bowl, whisk together the all-purpose flour, cocoa powder, salt, and baking powder. Sifting helps avoid lumps, ensuring a smooth brownie base full of rich flavor.
Step 5: Combine Dry and Wet Ingredients
Gradually add your dry mixture to the wet ingredients, mixing until just combined. This is where the magic really starts to happen, and the batter begins to take shape. Diving in with a spatula gives you a chance to channel your inner baker!
Step 6: Create the Bottom Brownie Layer
Spread half of the brownie batter evenly in the greased baking pan. It’s a satisfying moment when you see that luscious chocolate layer begin to form.
Step 7: Layer the Cookie Dough
Now it’s time to layer that irresistible chocolate chip cookie dough over the brownie batter. The cookie dough should be dropped in dollops and gently spread, but don’t worry too much about it being perfect – it’ll all melt together beautifully!
Step 8: Top with Remaining Brownie Batter
Finally, dollop the remaining brownie batter on top of the cookie dough layer. This extra chocolatey layer is a little treasure chest waiting for you once baked.
Step 9: Bake to Perfection
Pop that pan into the oven and bake for about 25-30 minutes, or until a toothpick inserted comes out with some moist crumbs attached. Keep an eye on it, as we want that perfect fudgy texture with that slight gooeyness!
Step 10: Chill & Cut
Once baked to perfection, allow the Brookies to cool in the pan for a while before cutting into bars. The anticipation will be high, but trust me – they taste even better after a little cooling!
Serving Suggestions & Pairings
These indulgent Brookies pair beautifully with a scoop of vanilla ice cream or a drizzle of caramel sauce. For an extra treat, serve them warm with a cup of freshly brewed coffee or a tall glass of milk. Either way, they’re bound to impress!
Storage & Leftovers Guide
Store any leftovers in an airtight container at room temperature for up to 3 days, or refrigerate for up to a week. If you’d like to keep them for longer, you can freeze them for up to 3 months! Just make sure to wrap them tightly before freezing.
Kitchen Wisdom & Success Tips
- Make sure your butter is melted but not hot; let it cool slightly to avoid scrambling the eggs.
- For a fun twist, try adding nuts or a swirl of peanut butter for added flavor.
- Don’t overmix the batter; mixing just until combined keeps the texture delightful!
Flavor Variations & Adaptations
- Swap out the chocolate chips for your favorite candy (hello, M&Ms!) for a colorful twist.
- Use gluten-free flour instead of all-purpose flour for a gluten-free version that still tastes amazing.
- Experiment with different add-ins like caramel chunks or toasted coconut for a unique flair!
Reader Questions & Solutions
-
What if I don’t have a 9×9 pan?
You can use an 8×8 pan for thicker bars or a 9×13 pan for thinner ones; just adjust the baking time accordingly. -
Can I use margarine instead of butter?
Yes, margarine can work, but it may alter the flavor slightly. Stick with what you love! -
How can I ensure they bake evenly?
Make sure to spread your batter evenly and rotate your pan halfway through baking if your oven has hot spots. -
What if my Brookies are too dry?
Keep an eye on your baking time! If they seem dry, they may have been baked too long. Aim for that toothpick test! -
Can I make the dough ahead of time?
Absolutely! You can prepare the batter and store it in the fridge for up to 24 hours before baking.
Wrapping Up
I hope you feel as inspired to create these Brookies as I am every time I bake them! With their delightful mix of textures and rich, chocolatey taste, they embody the joy of bakings. So roll up your sleeves, gather your ingredients, and let’s make some sweet memories together in the kitchen. Whether you’re sharing these bars with friends or indulging all on your own, they are sure to be a hit! Happy baking!
PrintBrookies
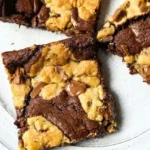
A delightful fusion of brownies and cookies, Brookies feature a fudgy brownie layer cradling a buttery chocolate chip cookie layer.
- Prep Time: 15 minutes
- Cook Time: 30 minutes
- Total Time: 45 minutes
- Yield: 12 bars 1x
- Category: Dessert
- Method: Baking
- Cuisine: American
- Diet: Vegetarian
Ingredients
- 1/2 cup (1 stick) unsalted butter, melted
- 1 cup granulated sugar
- 1/2 cup brown sugar
- 2 large eggs
- 1 teaspoon vanilla extract
- 1 cup all-purpose flour
- 1/3 cup cocoa powder
- 1/4 teaspoon salt
- 1/2 teaspoon baking powder
- 1 cup chocolate chips
Instructions
- Preheat the oven to 350°F (175°C) and grease a 9×9-inch baking pan.
- Combine the melted butter, sugar, and brown sugar in a large bowl until smooth.
- Add the eggs and vanilla extract, mixing well until fully combined.
- Sift together the all-purpose flour, cocoa powder, salt, and baking powder in a separate bowl.
- Combine the dry mixture with the wet ingredients, mixing until just combined.
- Spread half of the brownie batter evenly in the greased baking pan.
- Layer the cookie dough over the brownie batter in dollops.
- Top with the remaining brownie batter dolloped on top of the cookie dough.
- Bake in the oven for about 25-30 minutes, or until a toothpick comes out with moist crumbs.
- Chill in the pan before cutting into bars.
Notes
Store leftovers in an airtight container for up to 3 days at room temperature or refrigerate for up to a week. For longer storage, freeze for up to 3 months.
Nutrition
- Serving Size: 1 bar
- Calories: 200
- Sugar: 15g
- Sodium: 100mg
- Fat: 10g
- Saturated Fat: 5g
- Unsaturated Fat: 5g
- Trans Fat: 0g
- Carbohydrates: 28g
- Fiber: 1g
- Protein: 2g
- Cholesterol: 0mg


